I’ve been wanting a pair of pants like this for many moons. Some potential patterns caught my eye: the silhouette was what I wanted but unfortunately each one seemed to call for woven fabric and I wanted knit. So I buckled down and modded my way into these.
About the Fabric
2 yards White Pinstripe On Black Midweight Designer Poly Knit from Cali Fabrics
- FABRIC CONTENT: Poly/Spandex
- FABRIC WIDTH: 54″
- WEIGHT: 280 GSM Midweight
- STRETCH: 4-way 125% horizontal, 50% vertical
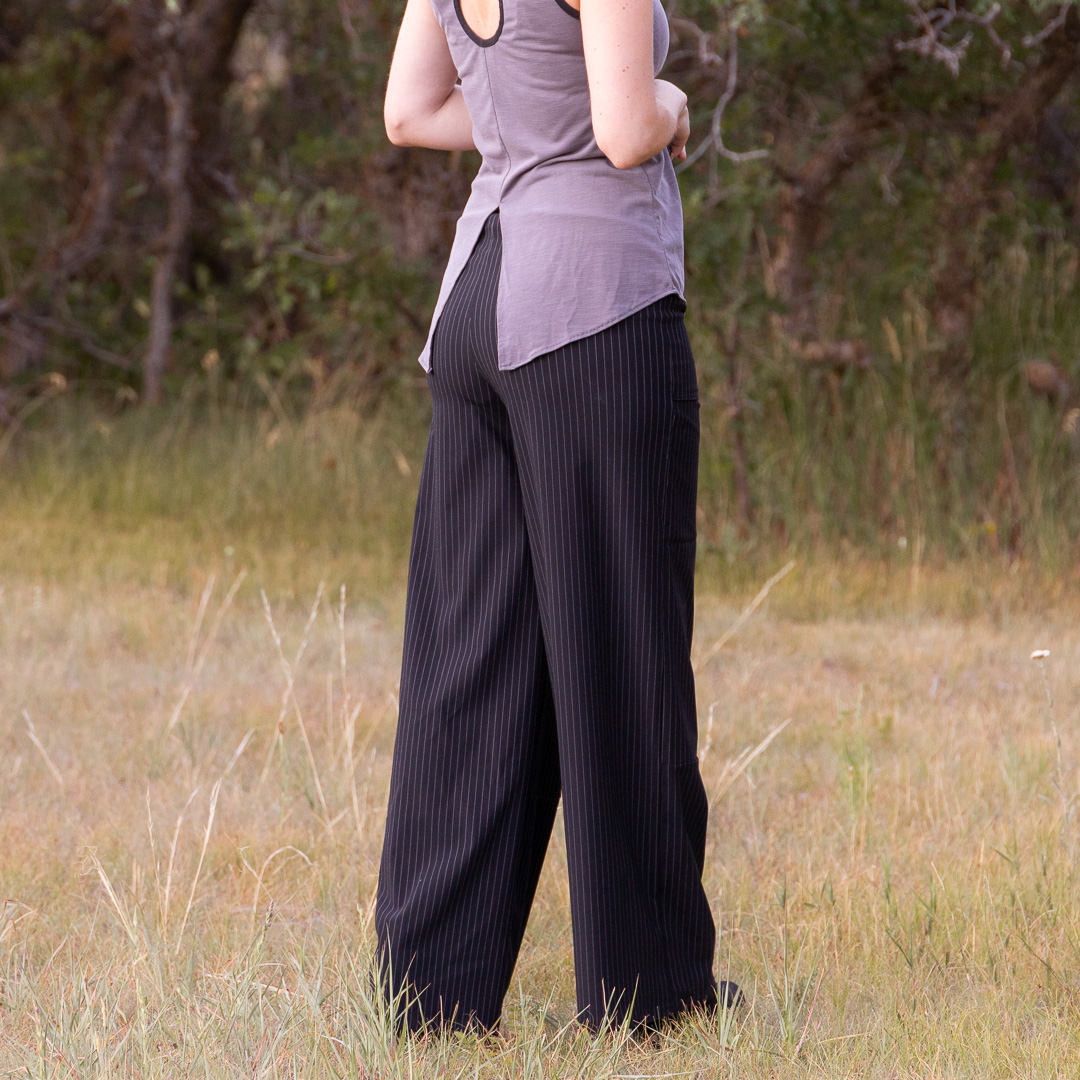
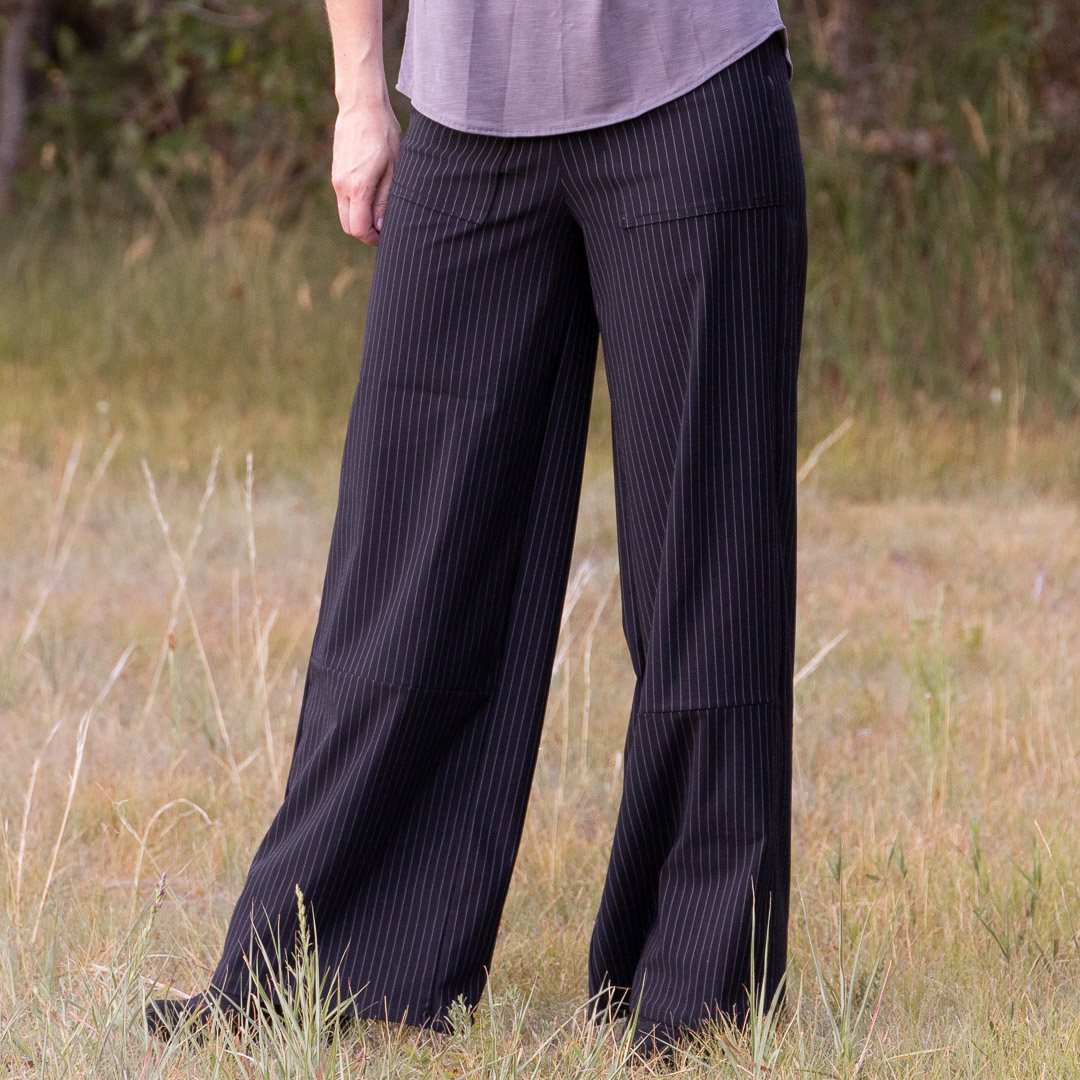
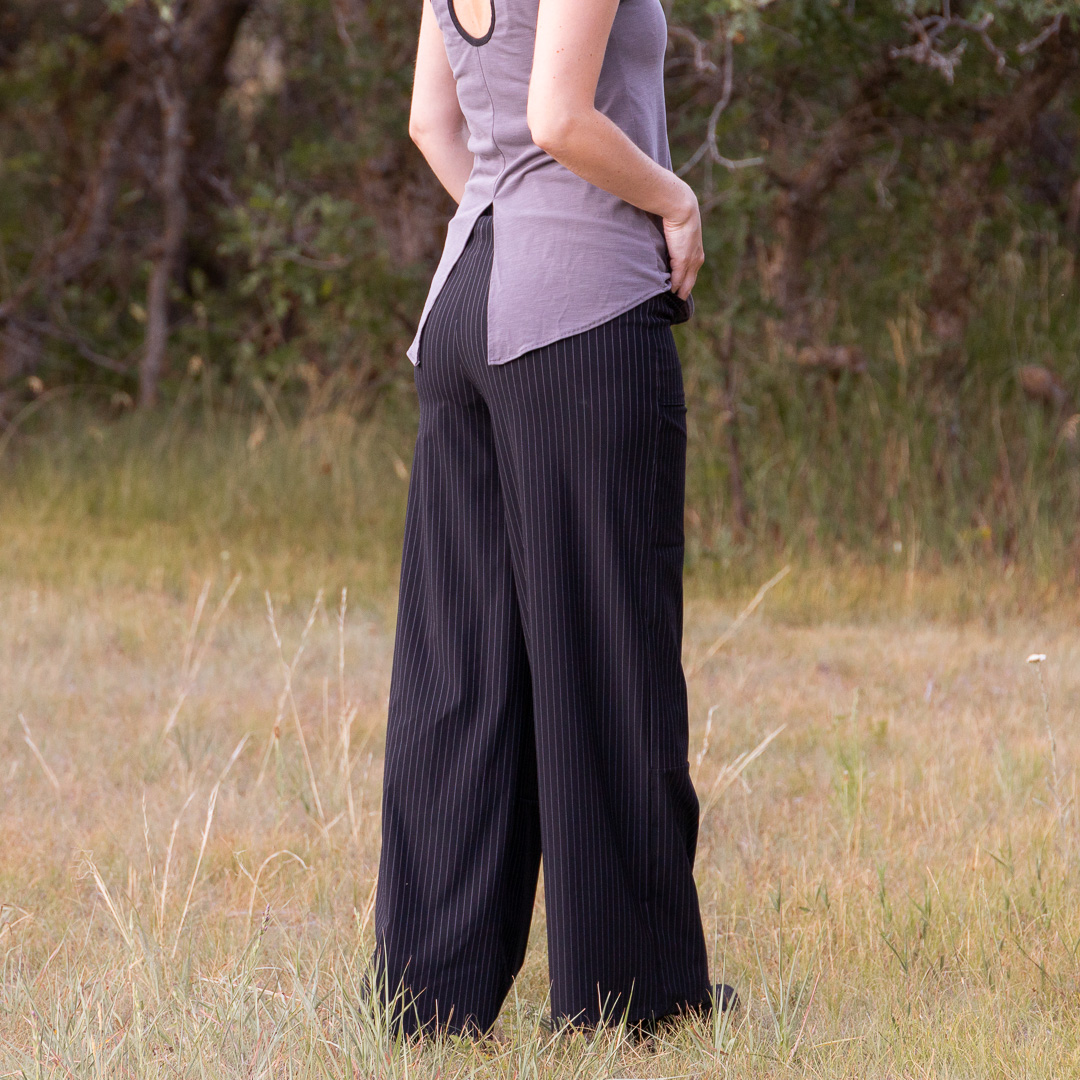
A designer deadstock from Cali, this poly knit has a smooth hand, mildly structured drape, and excellent recovery. I thought it was ponte until about 30 seconds ago 😂. It sewed up real nice, though the cut edges rolled quite a bit, especially after pressing with steam. It didn’t crease incredibly well, but even with those caveats, it behaved very nicely. And who doesn’t love a nice pinstripe?
About the Pattern
Patterns for Pirates Cozy Pants
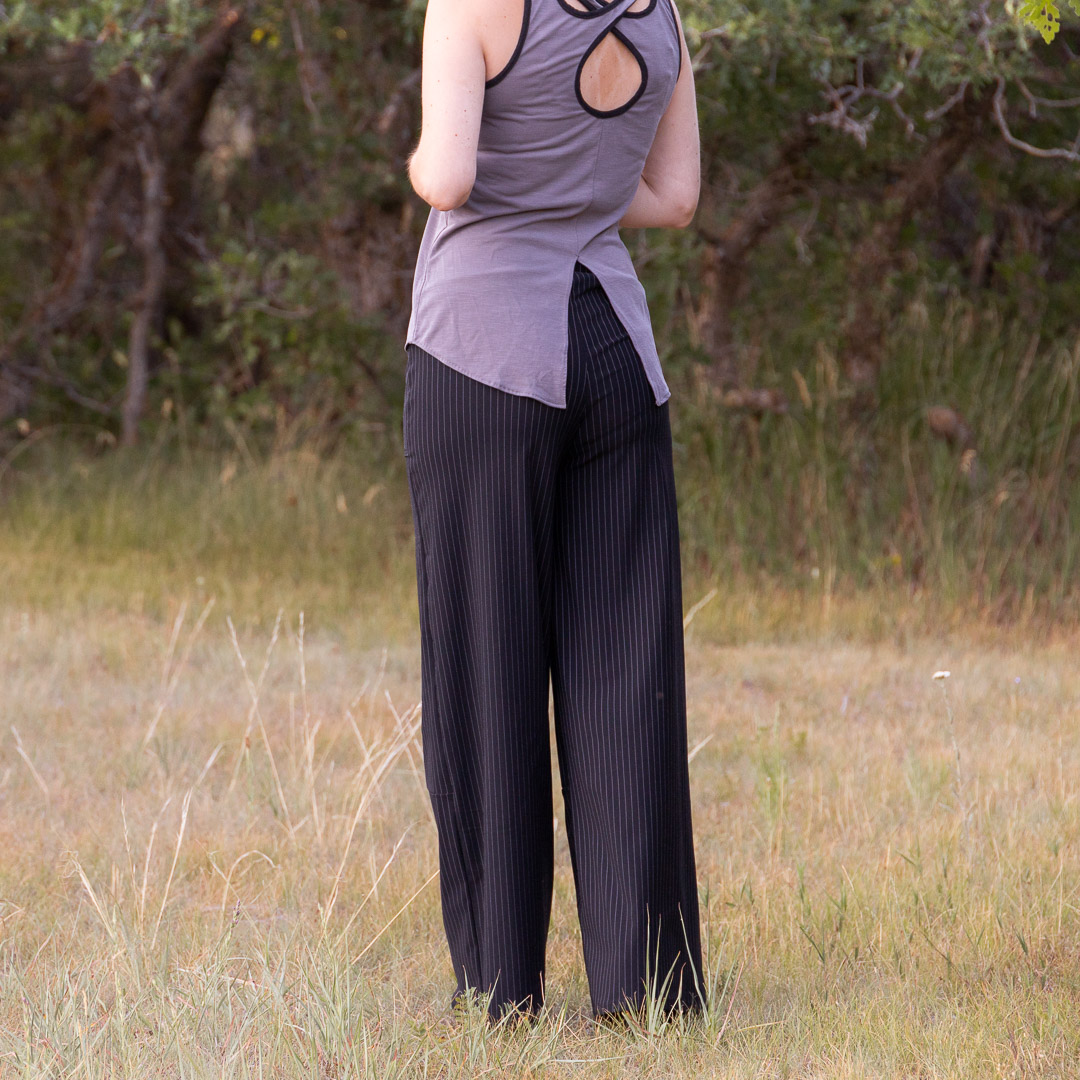
I have a bit of a collection of Cozy Pants already, and ironically none of them are for lounging around. In my world, they make a fabulous dress pant. All it takes is the right fabric choice and voila: dress pants that feel like loungewear.
I had to modify where I landed on my last pair quite a bit to achieve the look I was going for. Which involved three muslins and a self-drafted, contoured waistband. (Yeah, pants always take a lot of testing, which is probably why I don’t sew them as often. Though I need to. I really need a solid collection of pants I love.)
This Make
- size Large, sewn at 1/4″ seam allowance (except attaching the waistband and folding over pocket edges, I used the indicated 1/2″ seam allowance.)
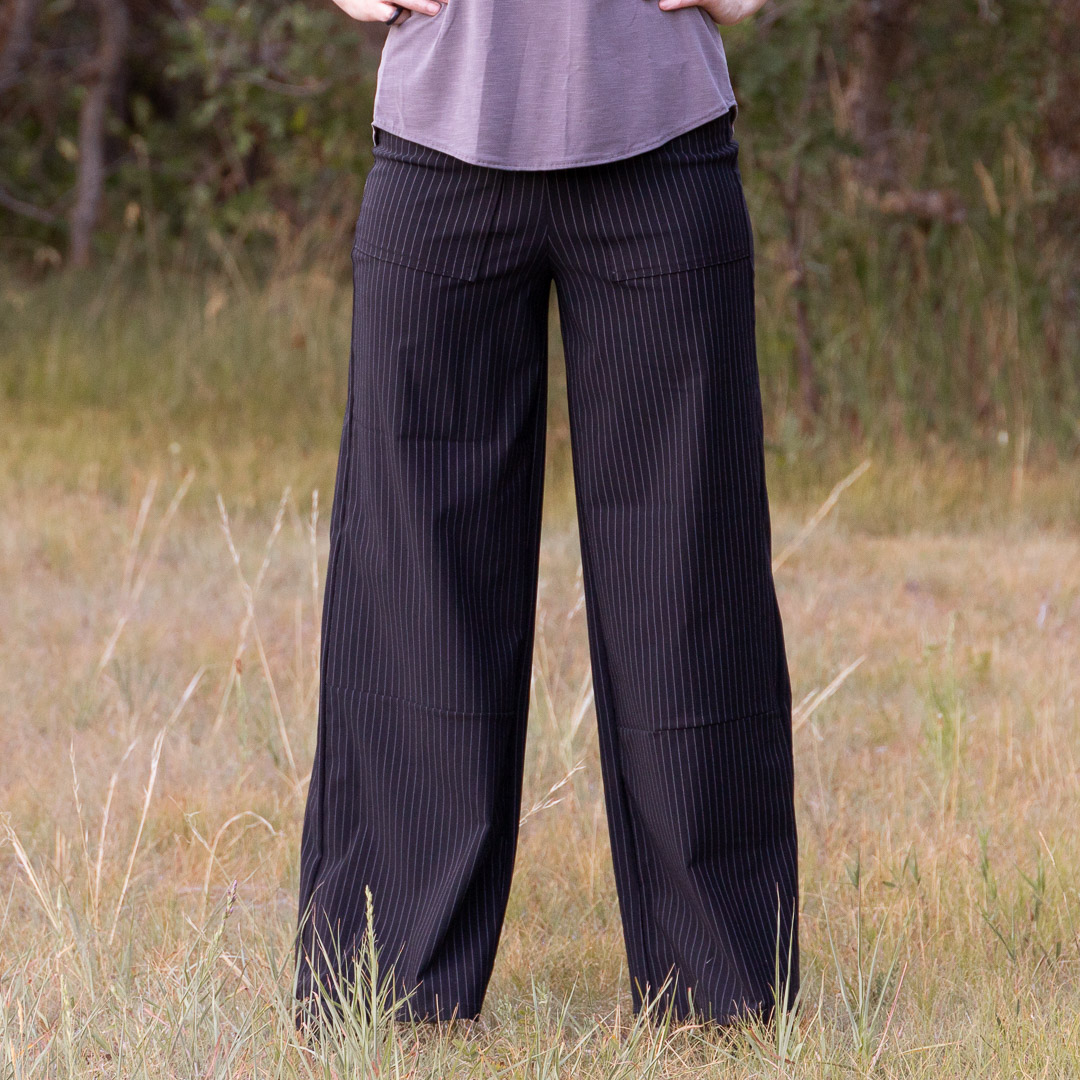
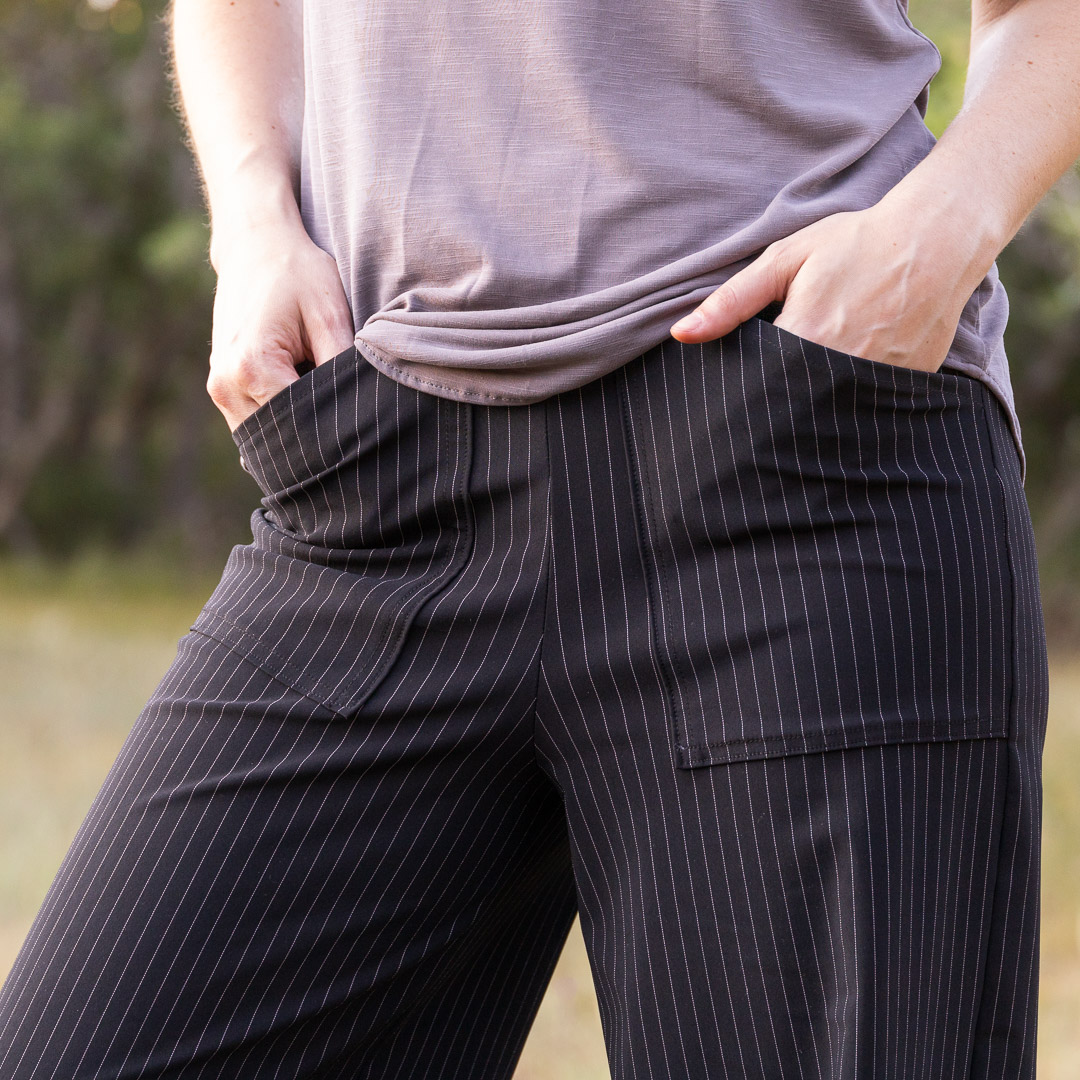
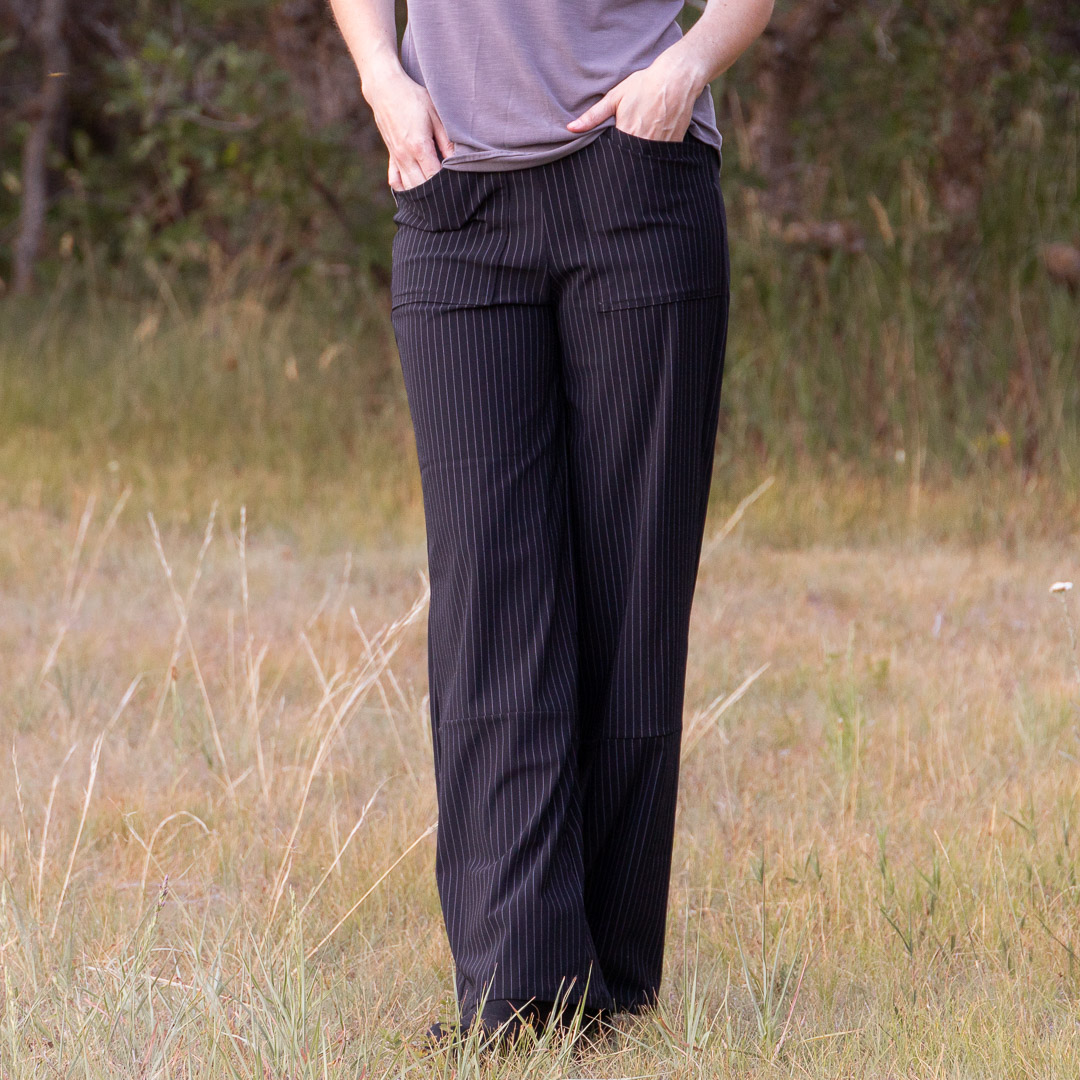
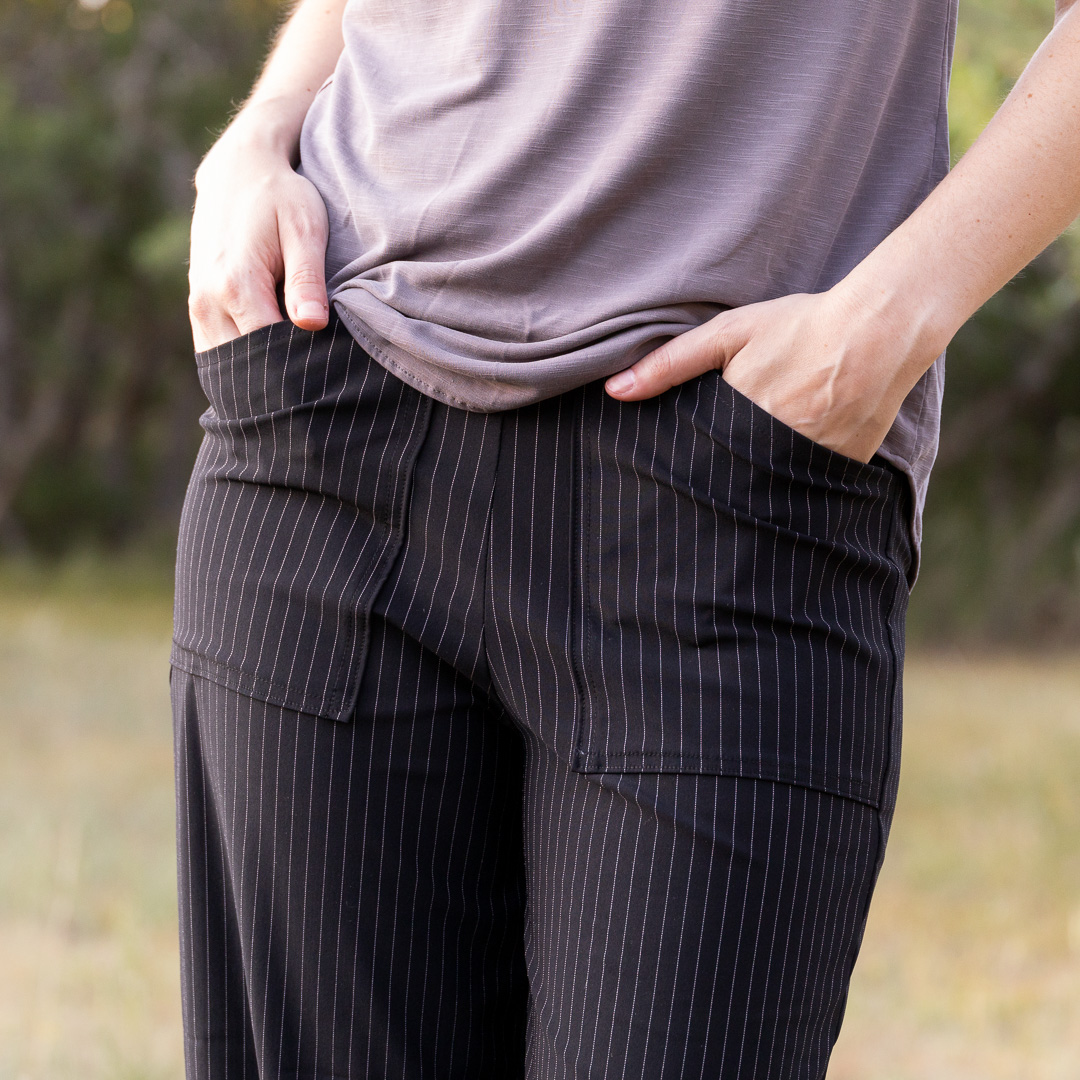
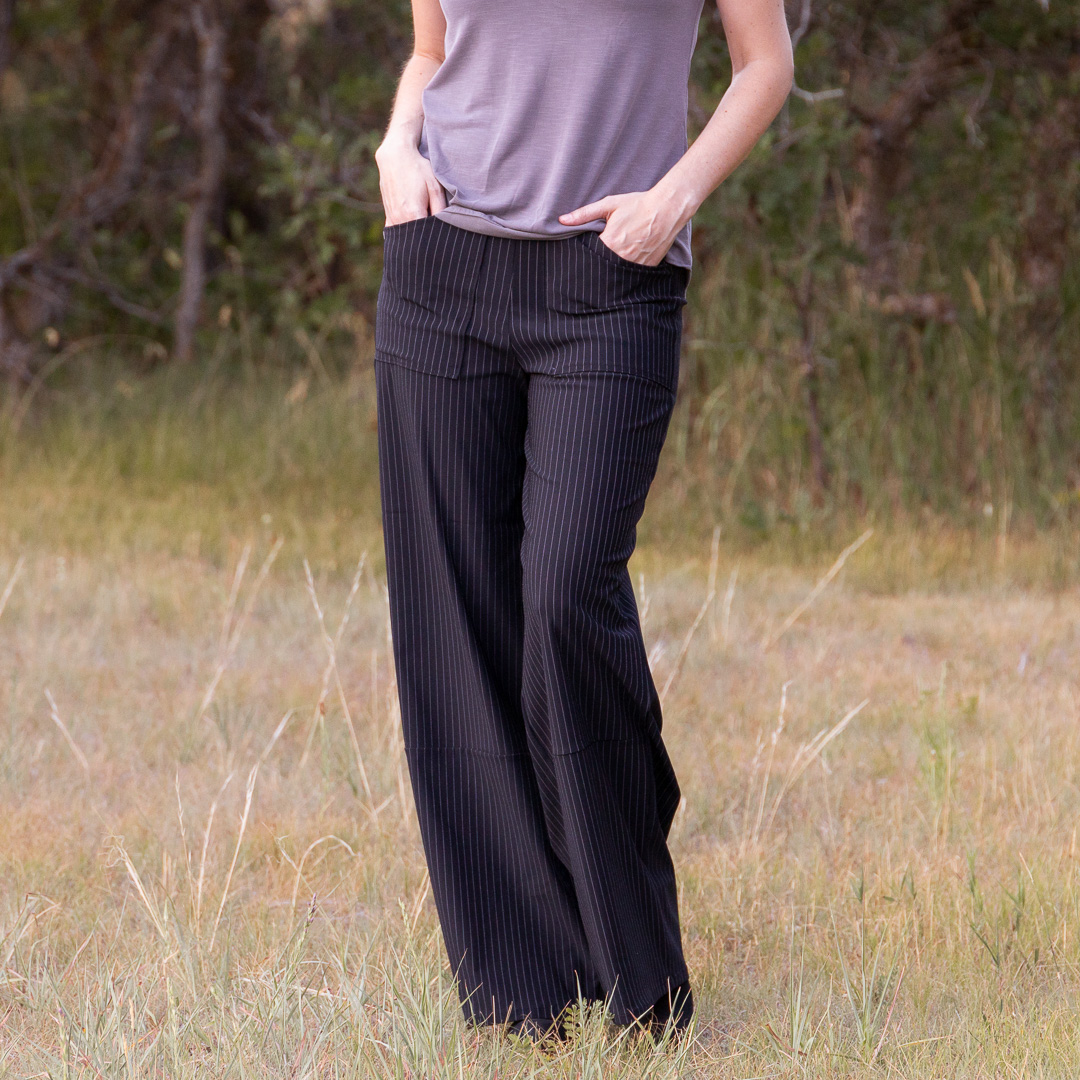
- high waist with pockets
- Medium crotch curve
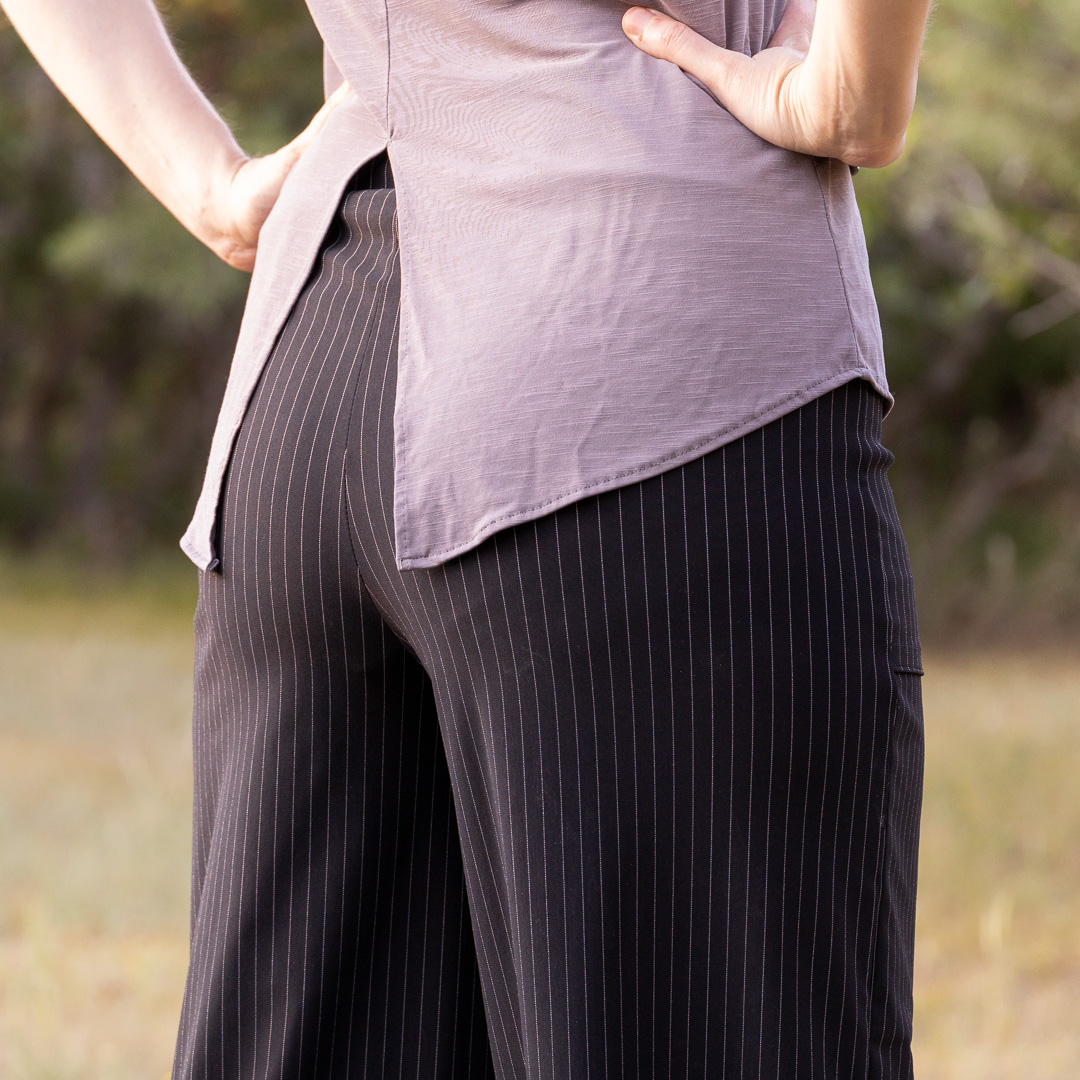
- Waistband contoured from Large at the bottom to Medium at the top
- 32″ inseam (at least, that’s what I cut it at. They ended up plenty long in the end, but the shin seams ate some of the length as did evening out the bottoms before hemming.)
What I Did Differently
- Sewed the waistband like a cuff to achieve the contoured shape without stitching around the top. I don’t know why it’s taken me this long to land on this technique but I need to commit to it. I hate stitching around my waist on fitted garments.
- Reshaped the legs to drop straight down from 1) the widest point around the hip, and 2) the crotch.
- All that glorious wide leg sucked up more fabric than I anticipated, so I didn’t have enough to cut one of the 4 pant leg pieces at full length. So I had to cut it in 2 pieces and sew a seam across the shin. Which meant sewing a seam across the shin on the other front piece so it would match. I wasn’t thrilled about that, but now that they’re done, I’m kind of liking the effect it has. It adds a little something reminiscent of cargo pants.
Notes for Next Time
- I don’t know that I’ll be nitpicky enough to try to remove some of the excess fabric caused by my swayback. That means more muslins and I just don’t have the throw-away fabric to wrestle through that. It’s so hard doing muslins with knit fabric for that reason.
- I forgot the pockets so I had to unpick the top portion of the side seams. Oops. Don’t forget the pockets next time.

Project Settings
Sewing Machine vs. Serger
| Sewing Machine | Serger |
|---|---|
|
|
Sewing Machine Settings
| Presser Foot | Stitch# | Stitch Width | Stitch Length | Needle | Top Thread Tension | Application |
|---|---|---|---|---|---|---|
| standard zig-zag (A) | 5 | 1.0 | 4 | blue tip | 4 | seams |
| overedge (C) | 1 | 3.5 | 3.5 | blue tip | 4 | hem |
| adjustable edge (SE#5) | 5 | 1.0 | 4 | blue tip | 4 | pocket attach |
Serger Settings
| Stitch Name | 4-thread overlock |
|---|---|
| Needles | R, L |
| Finger | B |
| Threads | 4 |
| Tension Left Needle | 4 |
| Tension Right Needle | 4 |
| Tension Upper Looper | 4 |
| Tension Lower Looper | 4 |
| Cut Width | 6 |
| Stitch Length | 2.5 |
| Differential | 1.0 |
| Application | seams |
Leave a Reply