I need to review all the 5 out of 4 patterns I’ve made and see if I’ve ever been thrilled with any of them. I feel like I’m always just disappointed enough with the final results.
(Okay, so I haven’t made a ton from this designer, and out of them, my Agility tanks are my favorite. Other than those, my experience with the fit is never quite what I expect it to be.)
So what’s the problem with this one?
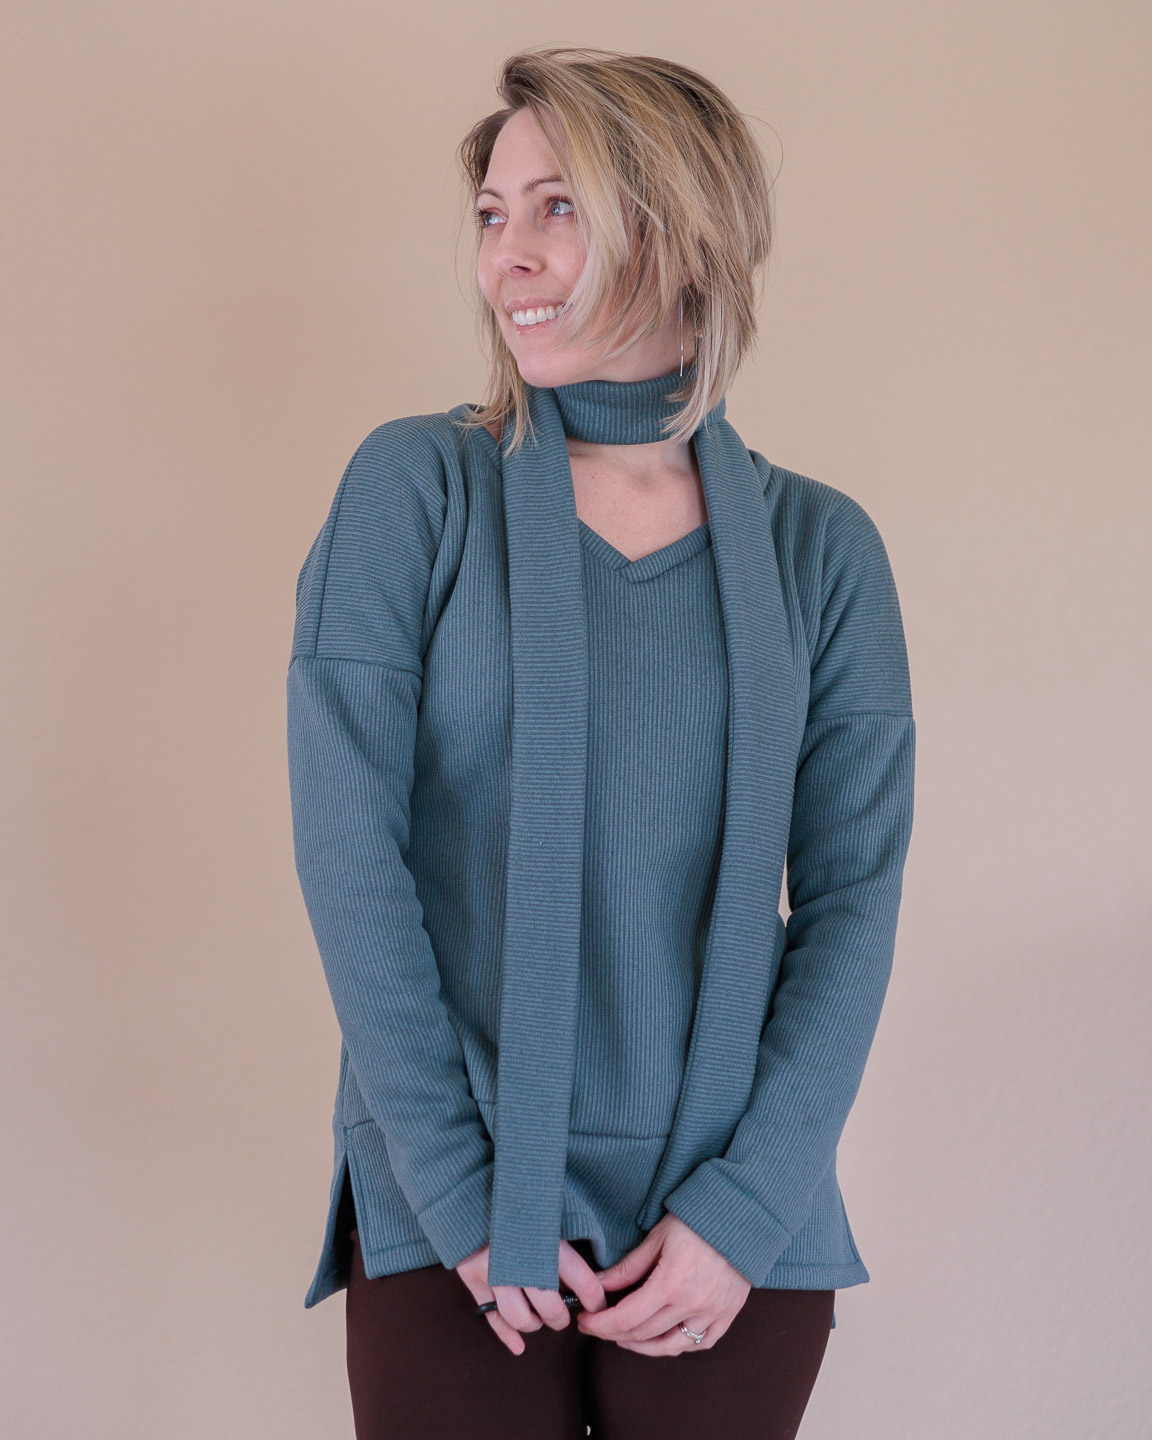
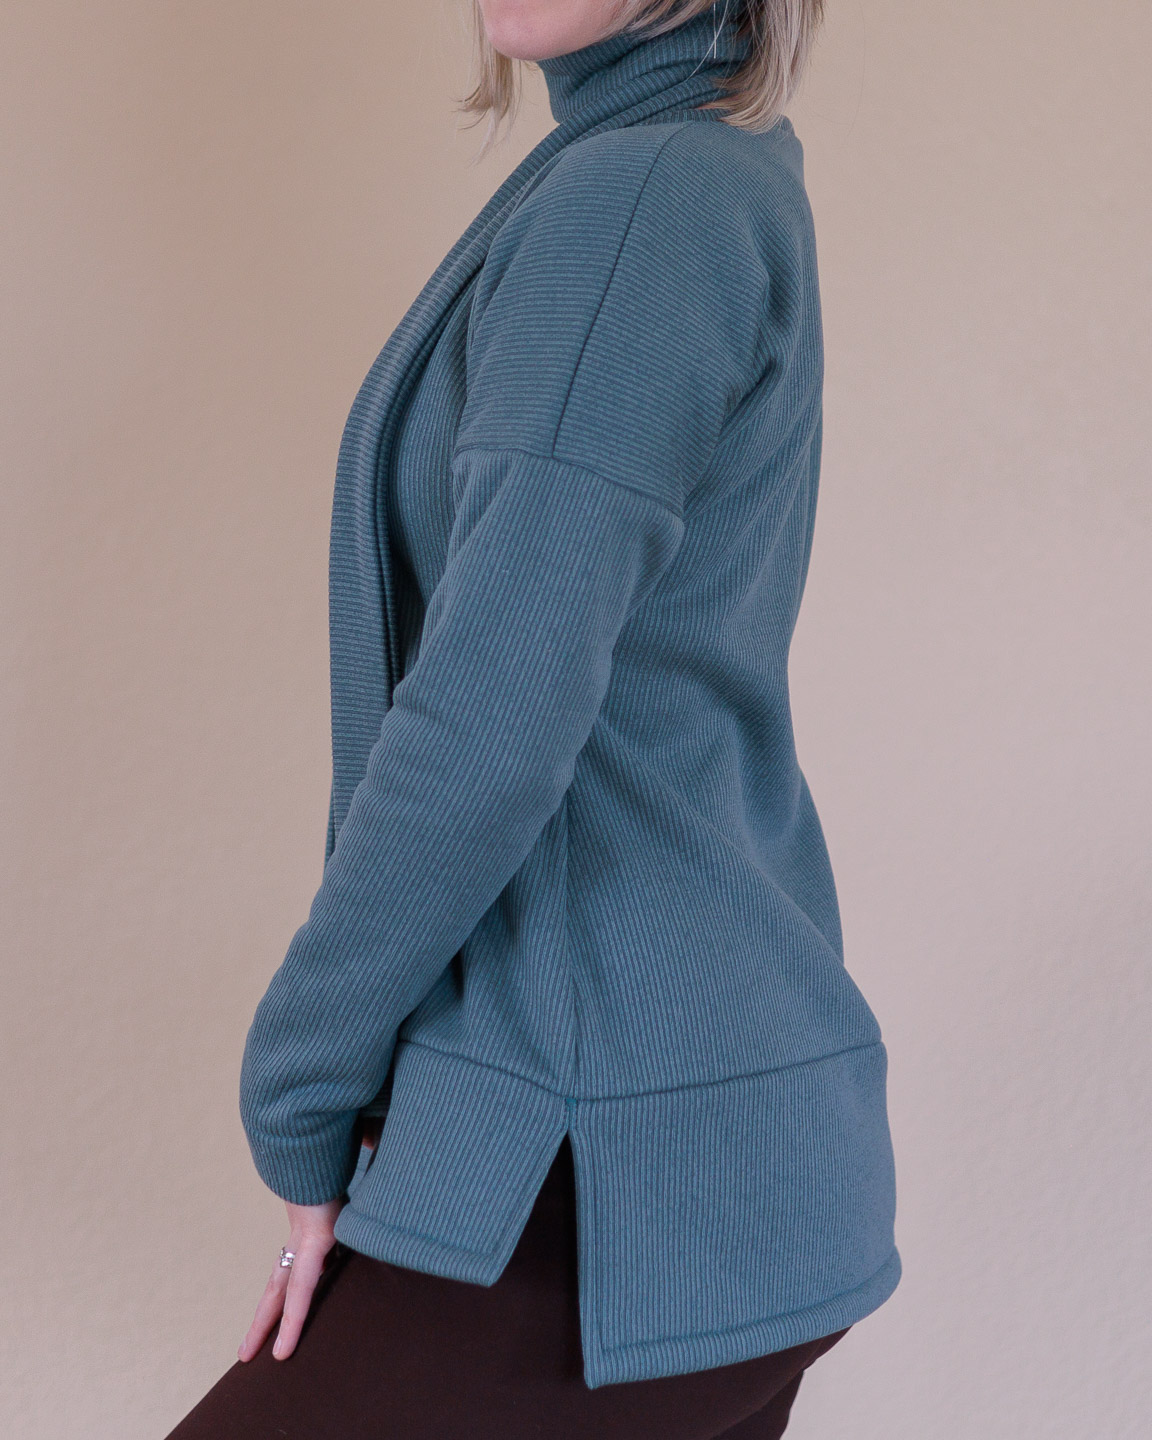
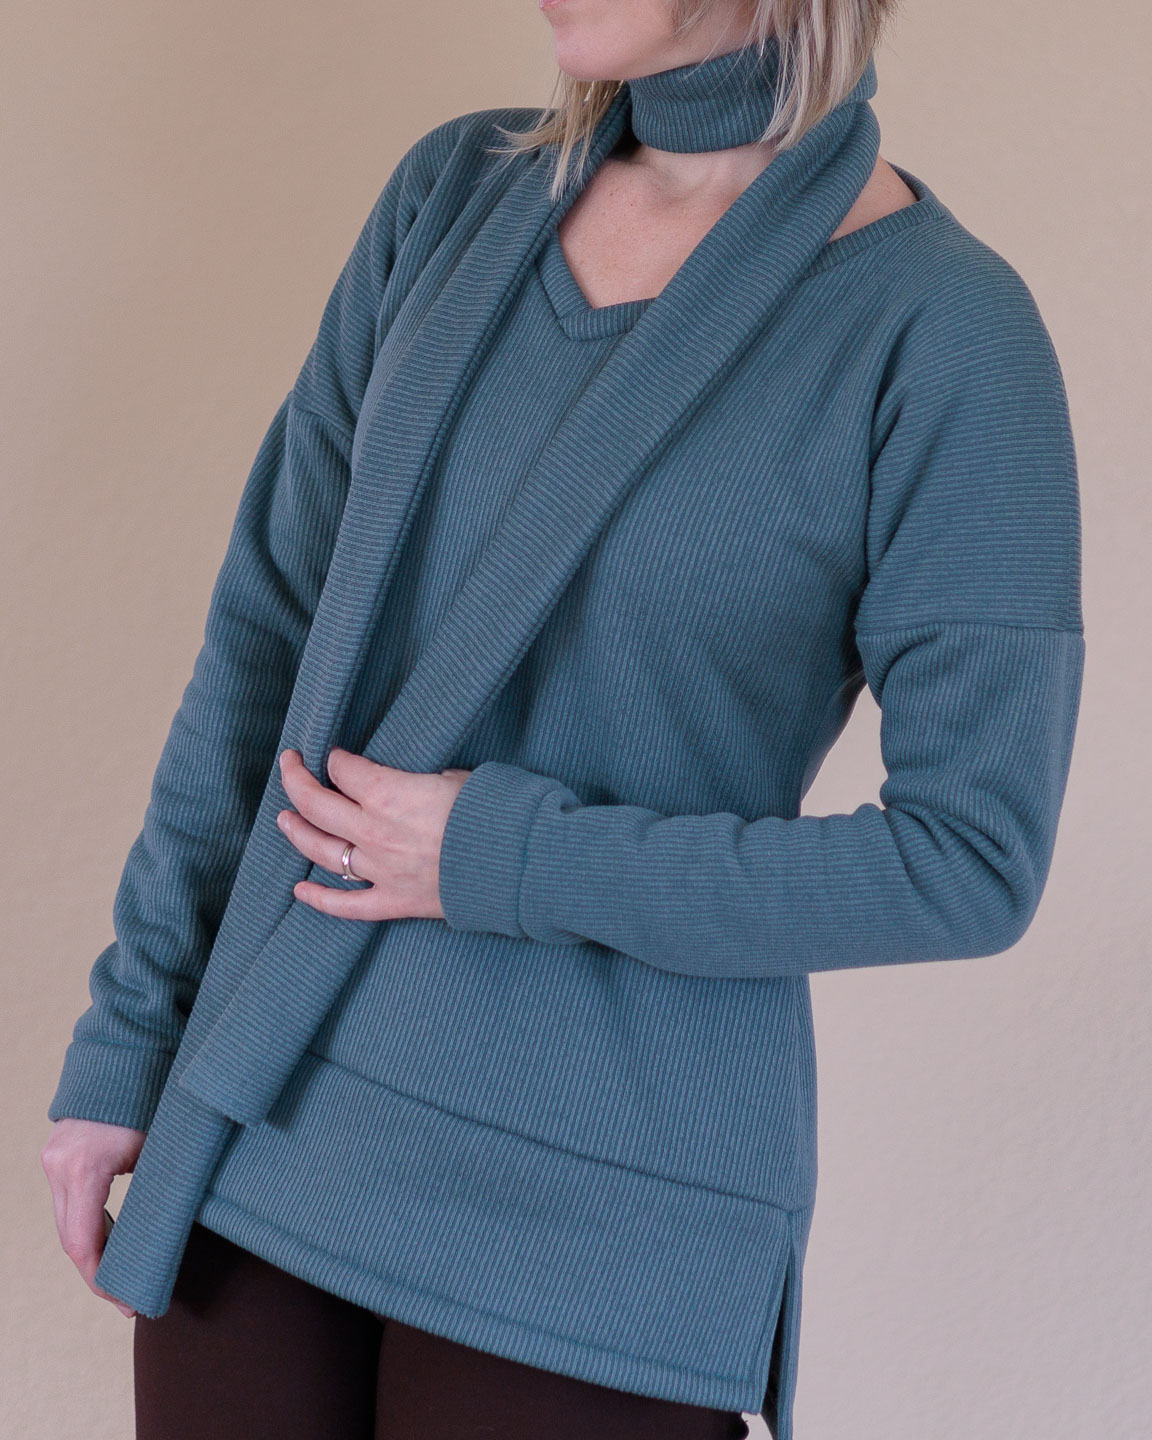
Probably mostly me. I used this intensely cozy brushed ribbed knit that lacks the drape this pattern seems to want, and I didn’t make a test version so I ended up with a bodice that I think is too short. Looks to me like the hip curve sits too high. The end result doesn’t look like what I envisioned in my head, and all that ease without the proper length basically creates a wind tunnel for air to invade my torso. I won’t tell you how I was shoveling snow to find out that little tidbit.

In other (good) news, I broke out one of my fagoting stitches for the first time and I’m so tickled with it! I want to use it as a major detail on something in the future; maybe on some princess seams on a long fitted vest that’s been lurking in my head for literal years. Maybe with some contrast thread. What a cool stitch!
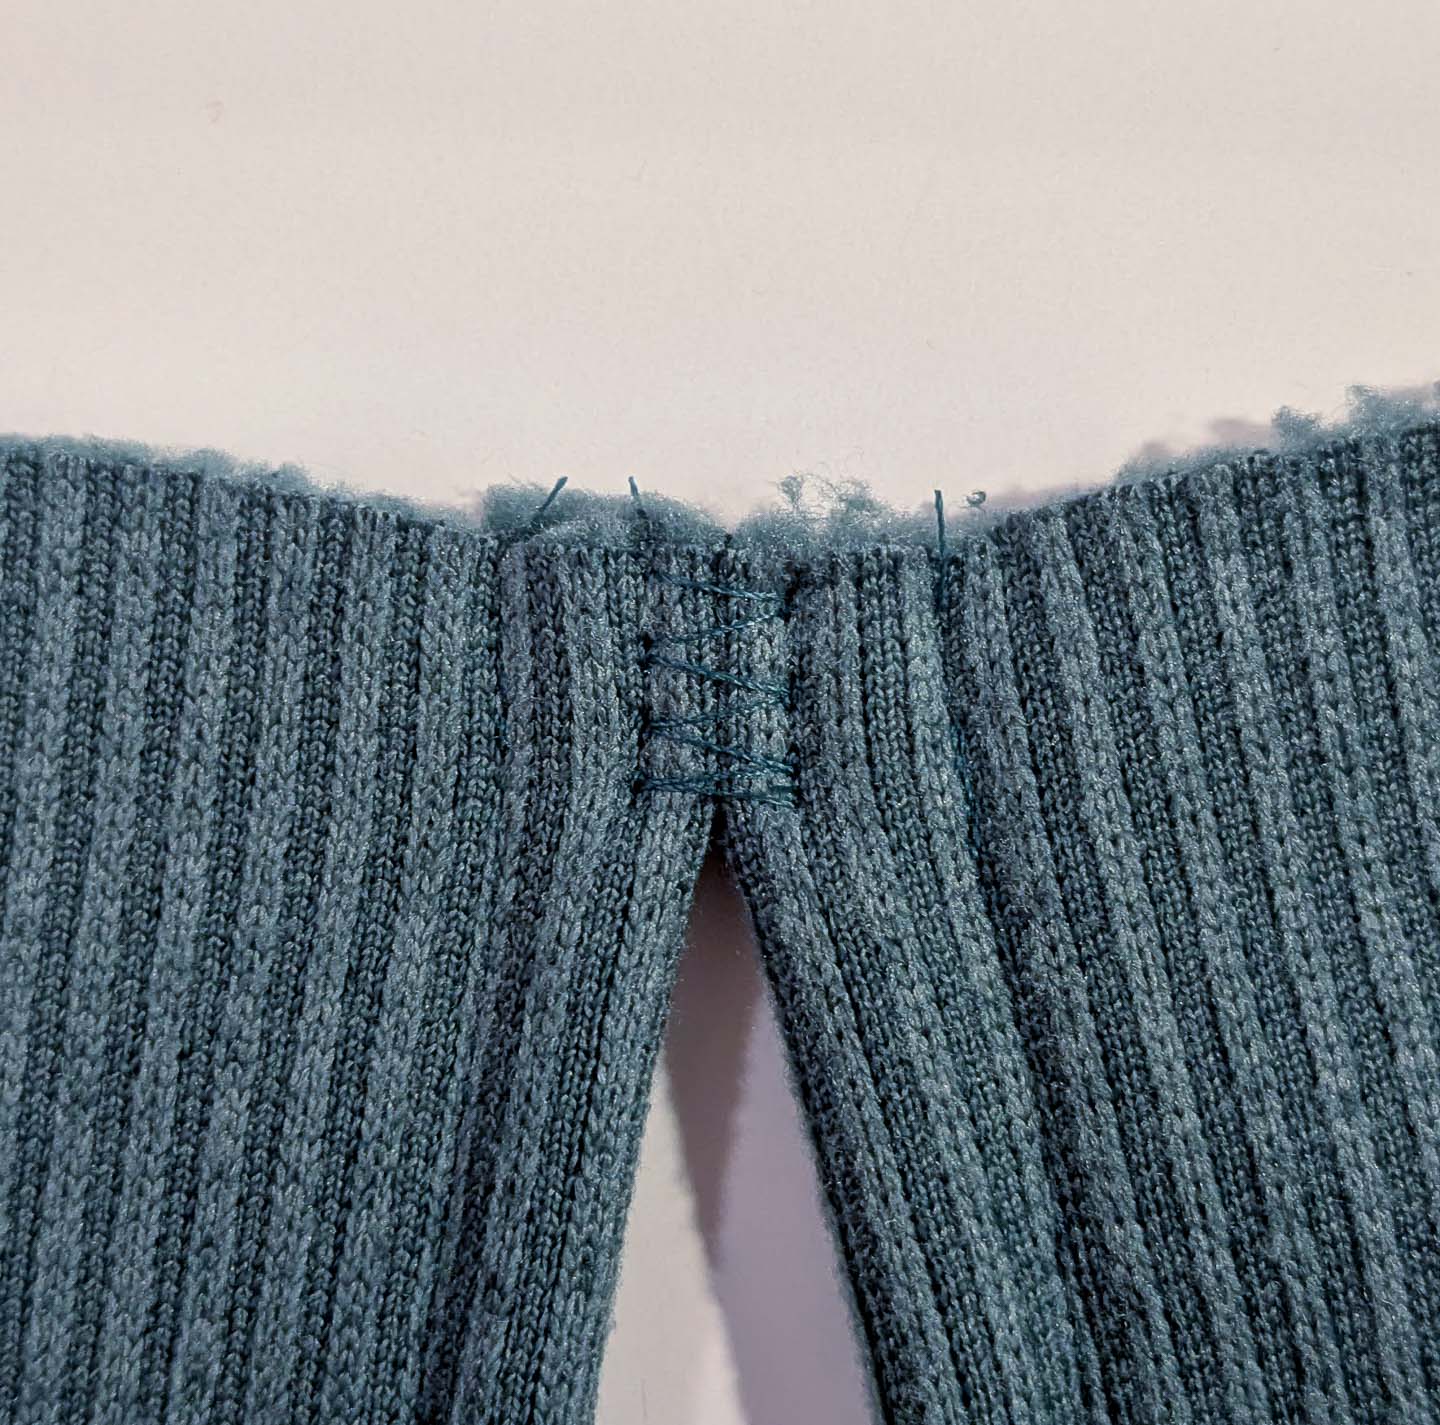
a fagoting stitch (#46 on my machine)
About The Pattern
- size XS graded to S at hip
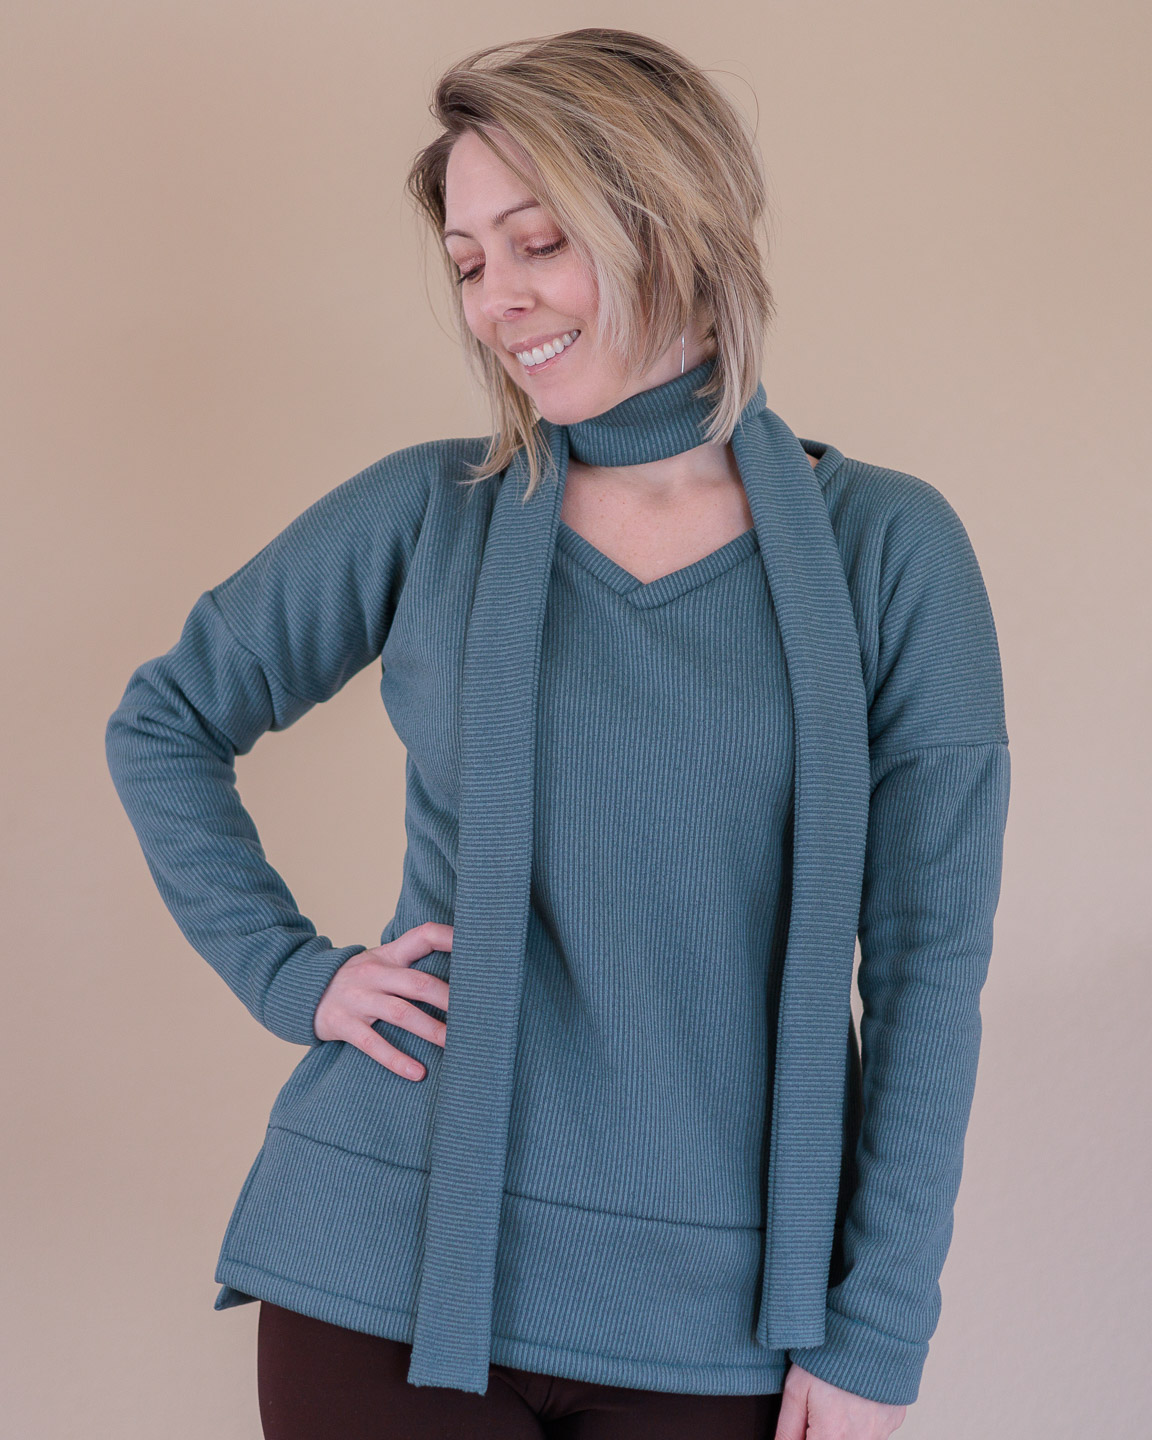
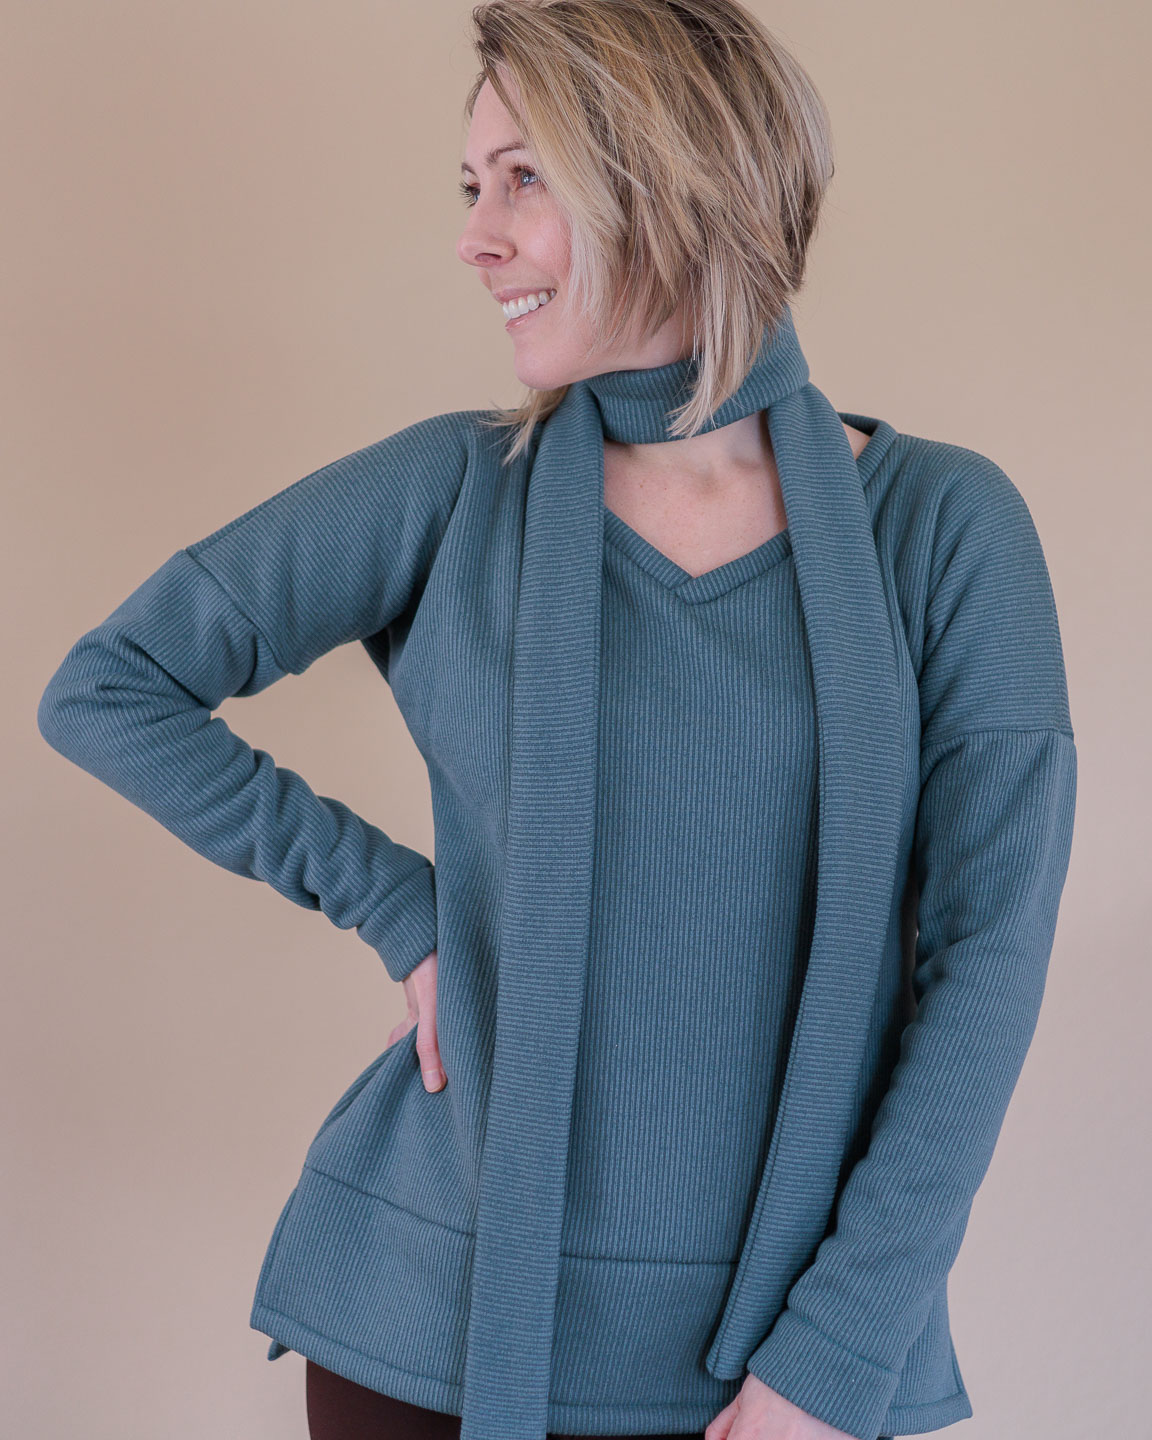
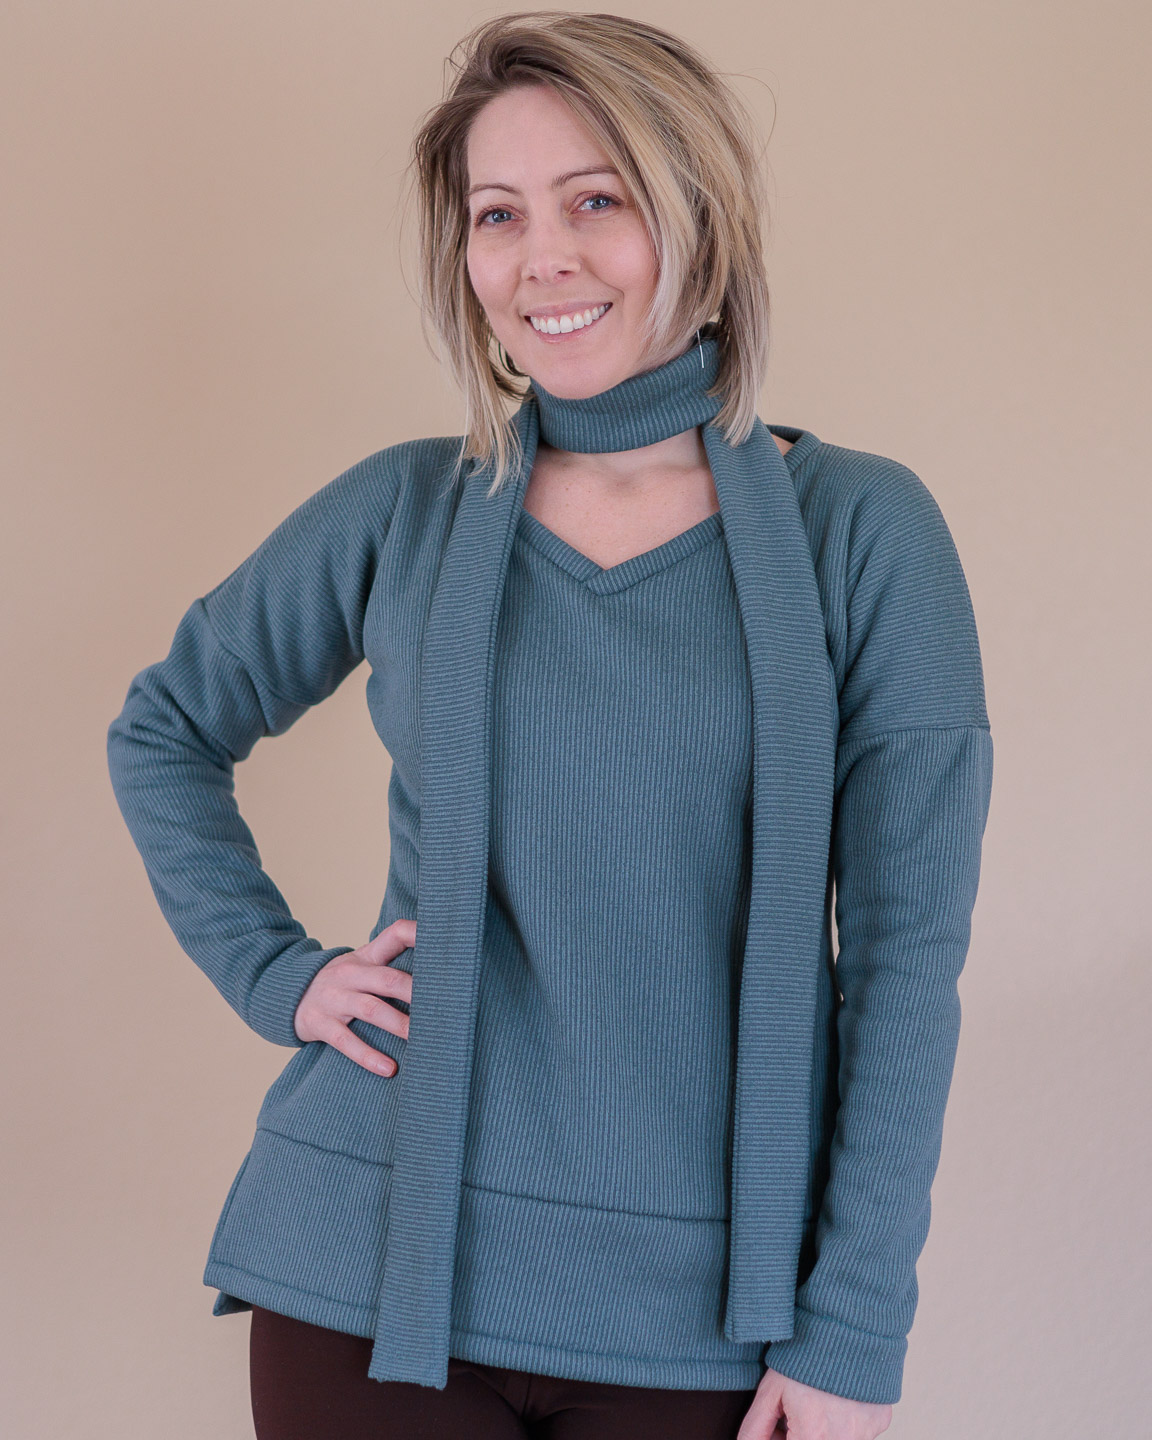
- v-neck
- long sleeve, standard width, +2″ length
- rolled cuffs
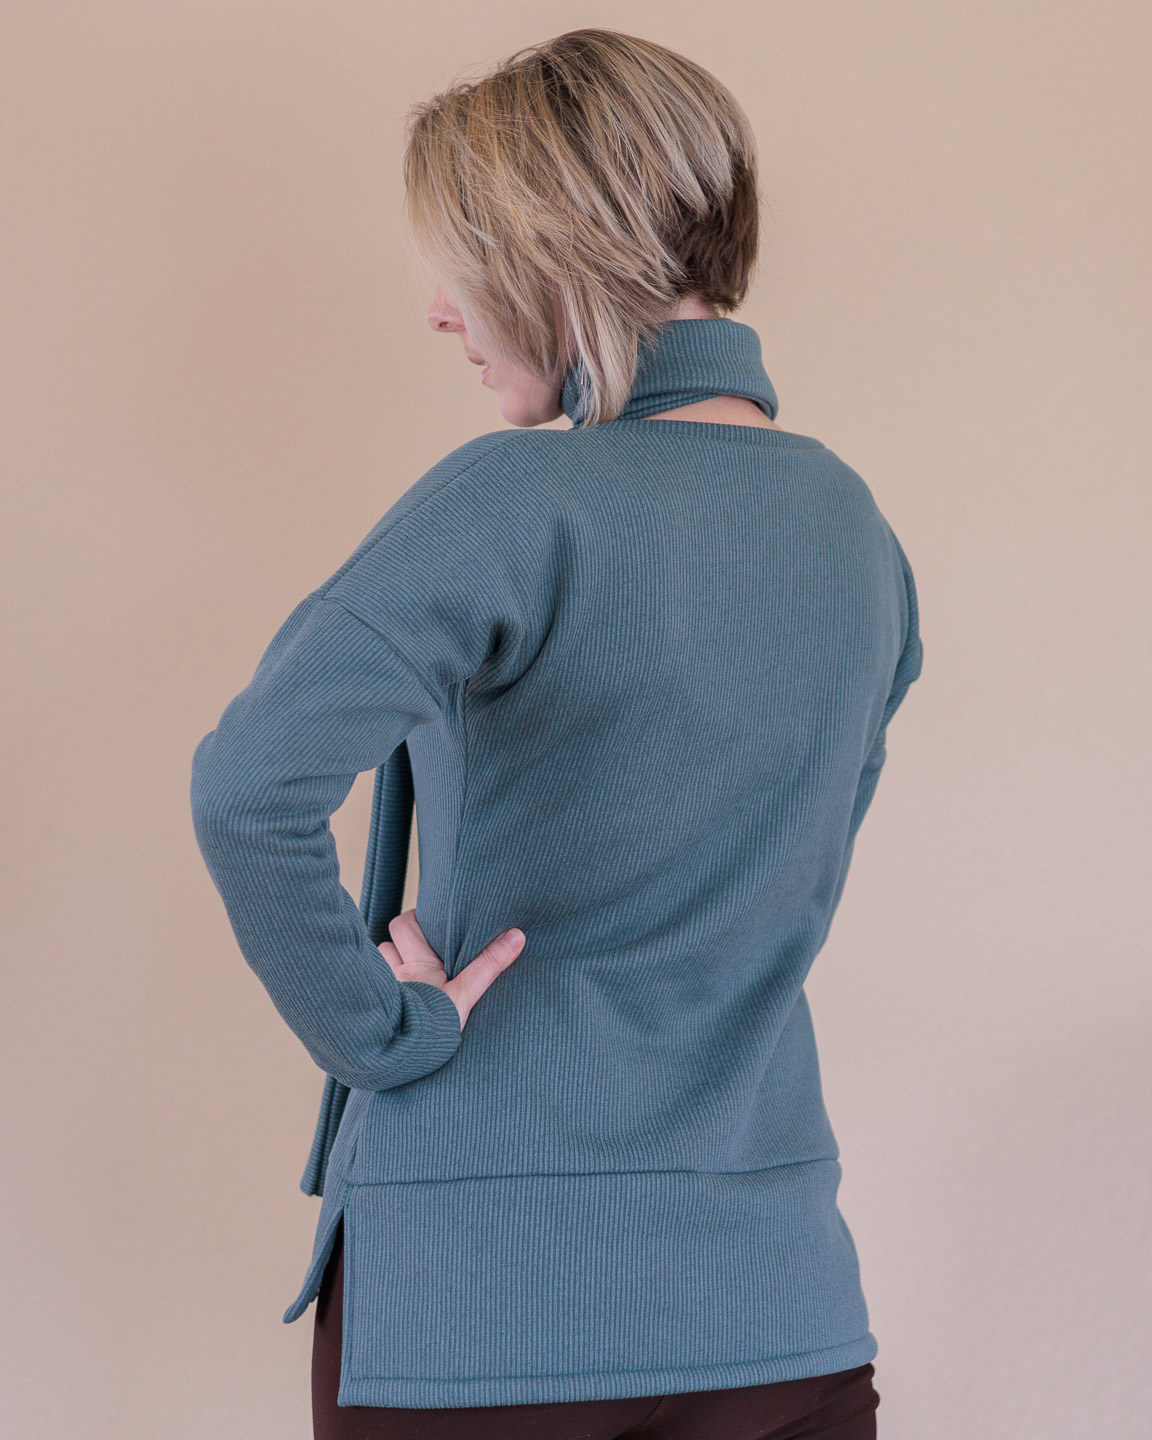
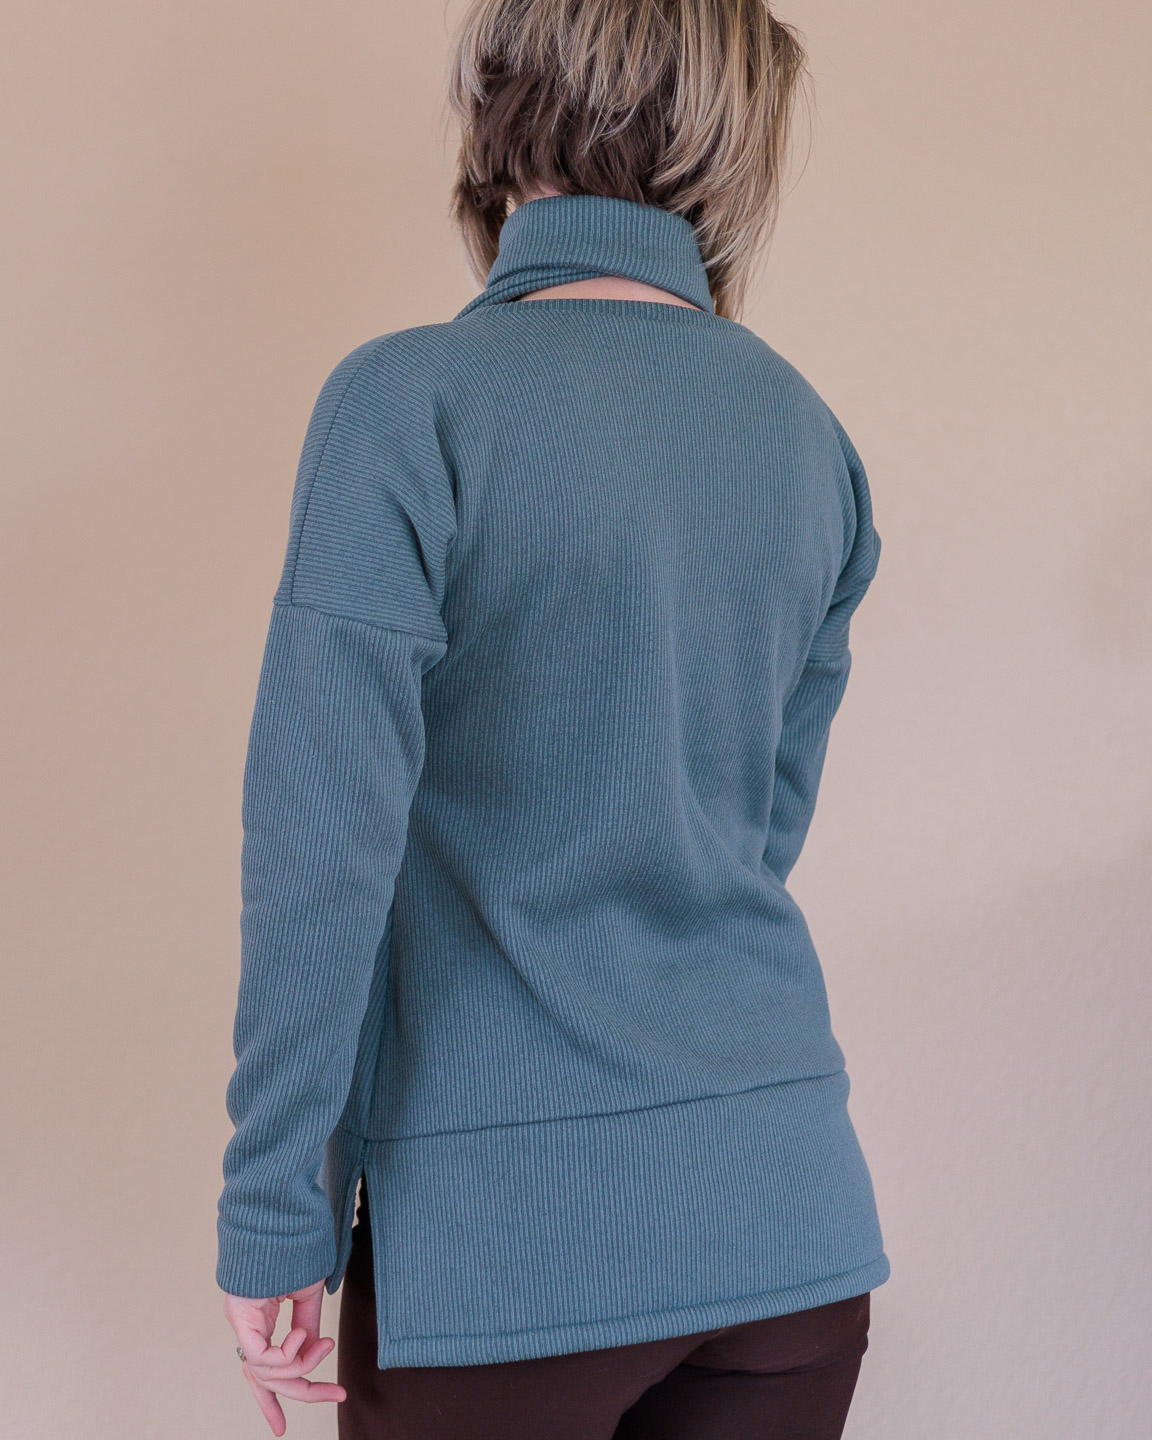
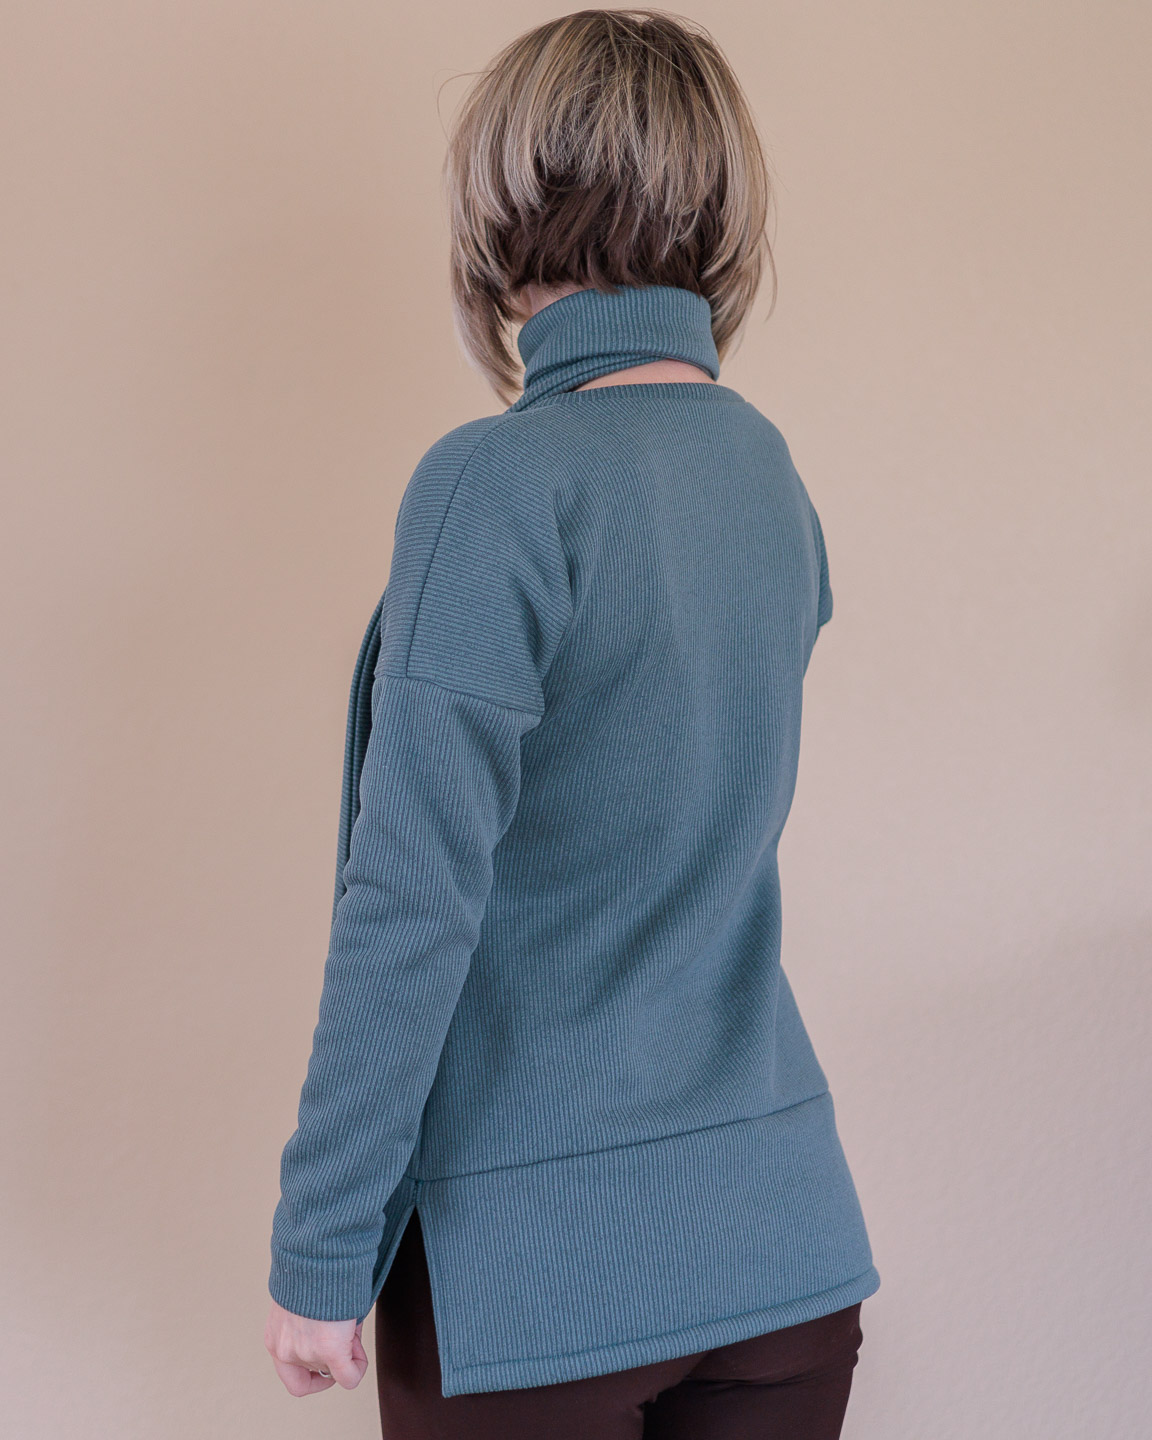
- short hem band on the front, long hem band on the back
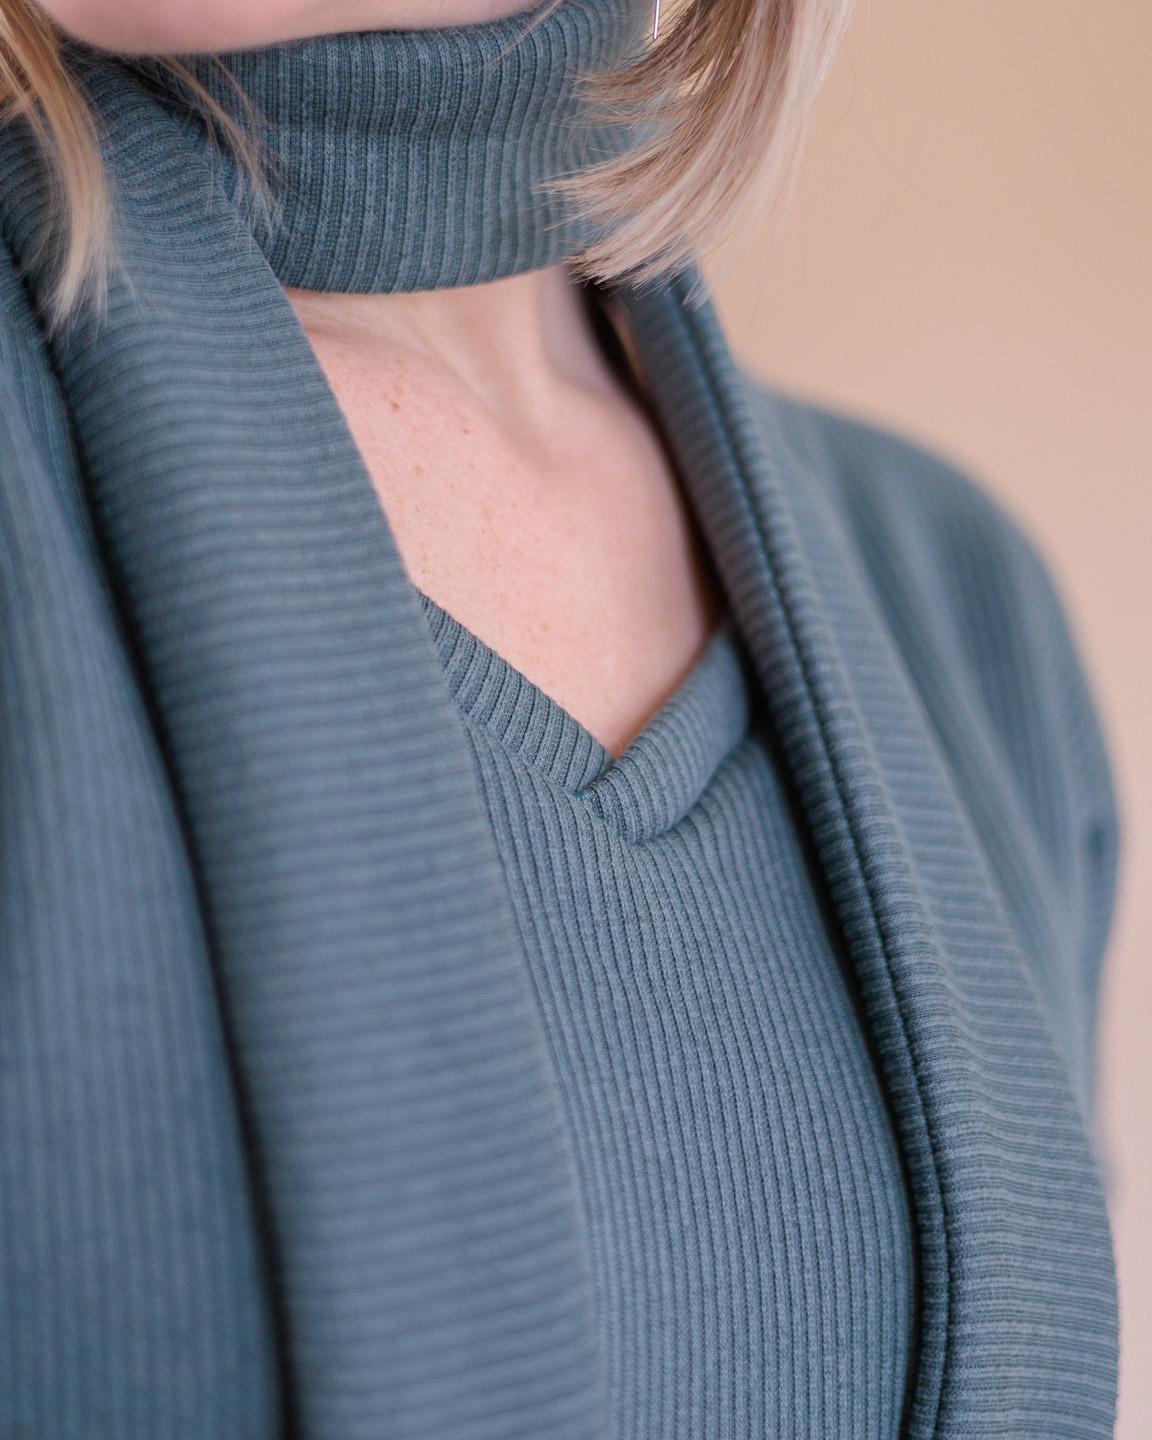
I love the overlapping front on the v-neck. I think I’ll start doing that to all my v-necks in the future. Rolled cuffs were new and interesting, too. Definitely a quicker way to do sleeve cuffs that I might start adopting more in the future.
Overall, the options I chose created a pretty straightforward sew. The most time consuming thing was the neckband, but most v-necks are like that. You must take the extra time to get good results, and between the basting and sewing the point of the V separately first, the technique in this pattern sets you up well (along with following my tips for sewing v-necks.)
About the Fabric
2 yards Lake Mist Teal Polartec Wind Pro Ribbed Sweater Fleece from Surge Fabrics
This fabric got stuck in my head after I saw it even though it was quite a bit more than I usually like to pay. I thought it would make a really great cozy-up-cuz-it’s-freeze-your-face-off-degrees-outside top.
- Fabric content: 100% Polyester
- Fabric Weight: 380gsm
- Fabric Width: 66/68″
- Stretch Percentages: 25% horizontal, 0 vertical
It is so thick. As such, it doesn’t drape very well. On the plus side, the brushed back is quite cozy. I just don’t think it shines so well with this pattern. It was easy to work with, though! Even the hem band corners were easily done despite the weight.
Here’s what Surge says about it:
Ward off winter’s chill with these elevated sweater fleeces from Polartec! The right side of the fabric features a 2×2 rib knit construction with a soft sherpa textured fleece on the wrong side. The tight knit construction makes it difficult for cold air to penetrate through. With a sweater knit face and soft fleece back, you can create sophisticated and elevated garments that will keep you fashionable and warm! Use it to make comfortable hoodies and cardigans or toasty sweaters and jackets or cozy lounge pants and joggers. Any remaining scraps you might have would make wonderful hats, mittens and socks. You won’t want to let any of this fabric go unused!
What I Did Differently
- For whatever reason, the pattern has you cut the back as two pieces and sew it together down the center. There’s zero contouring on that seam, so that seemed all kinds of pointless to me. I removed the seam allowance down the back center and just cut on the fold.
- I lengthened the sleeves by 2″. Great choice. I ended up with a good 2″ rolled cuff that supports my preference for extra long sleeves.
- I originally cut the sleeves using the slim fit line, but they were quite snug in this fabric, so I re-cut at the standard width before attaching to the bodice.
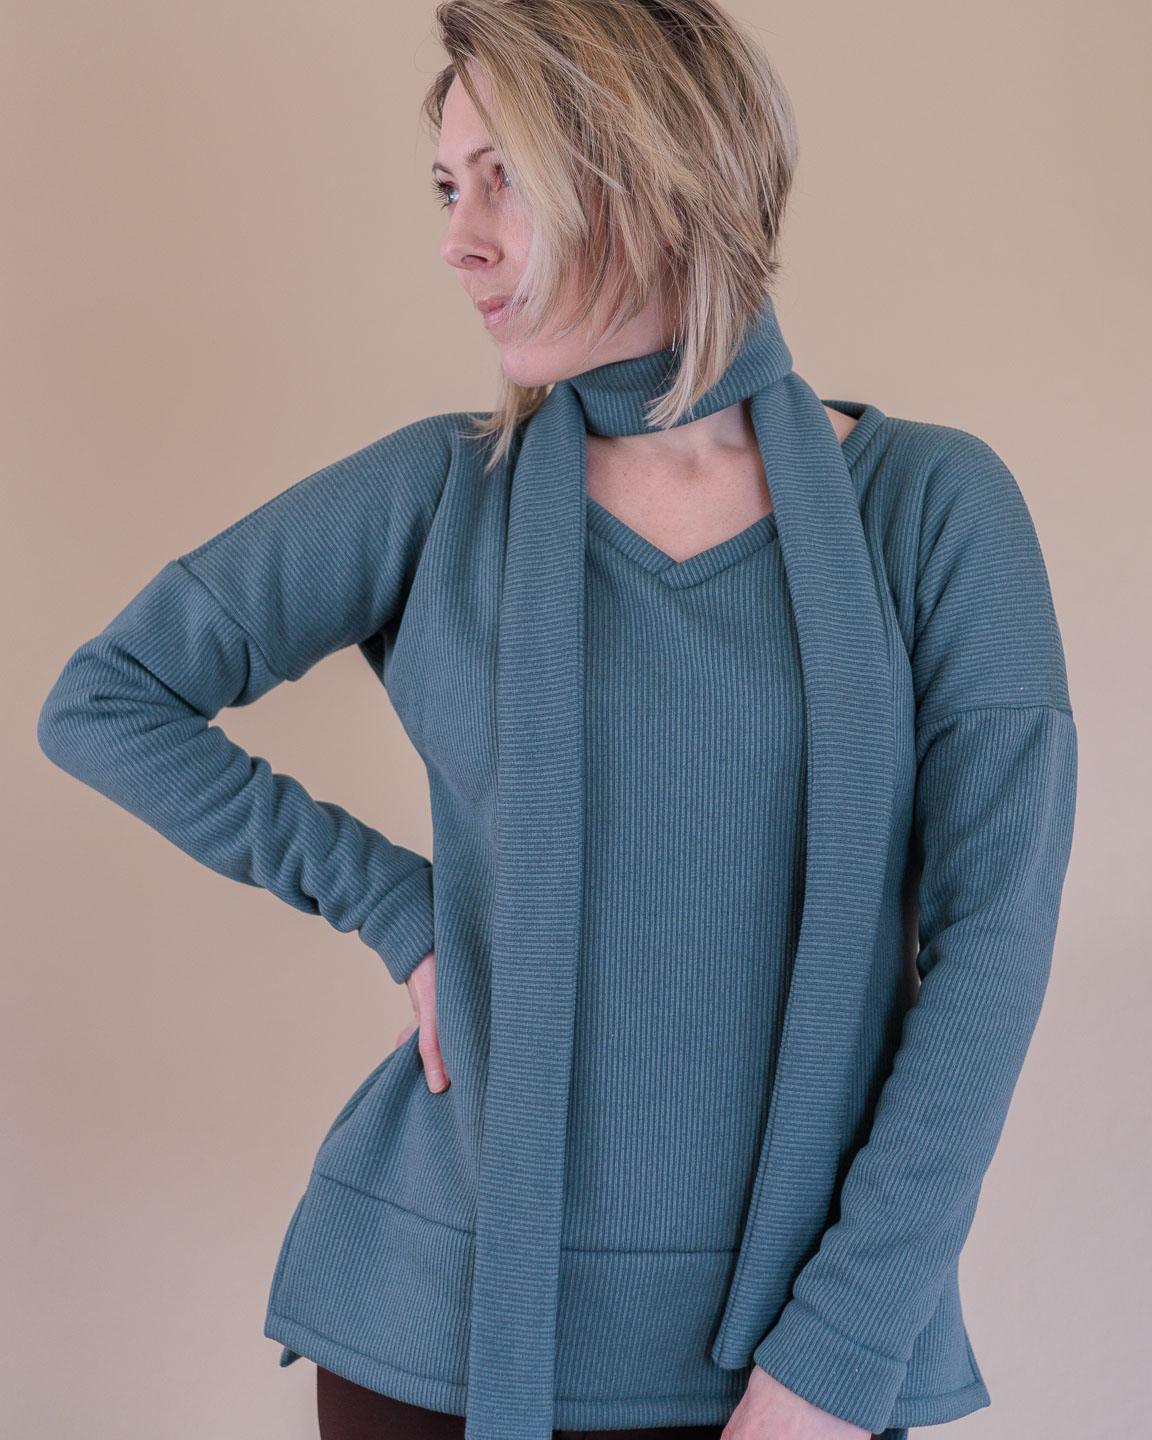
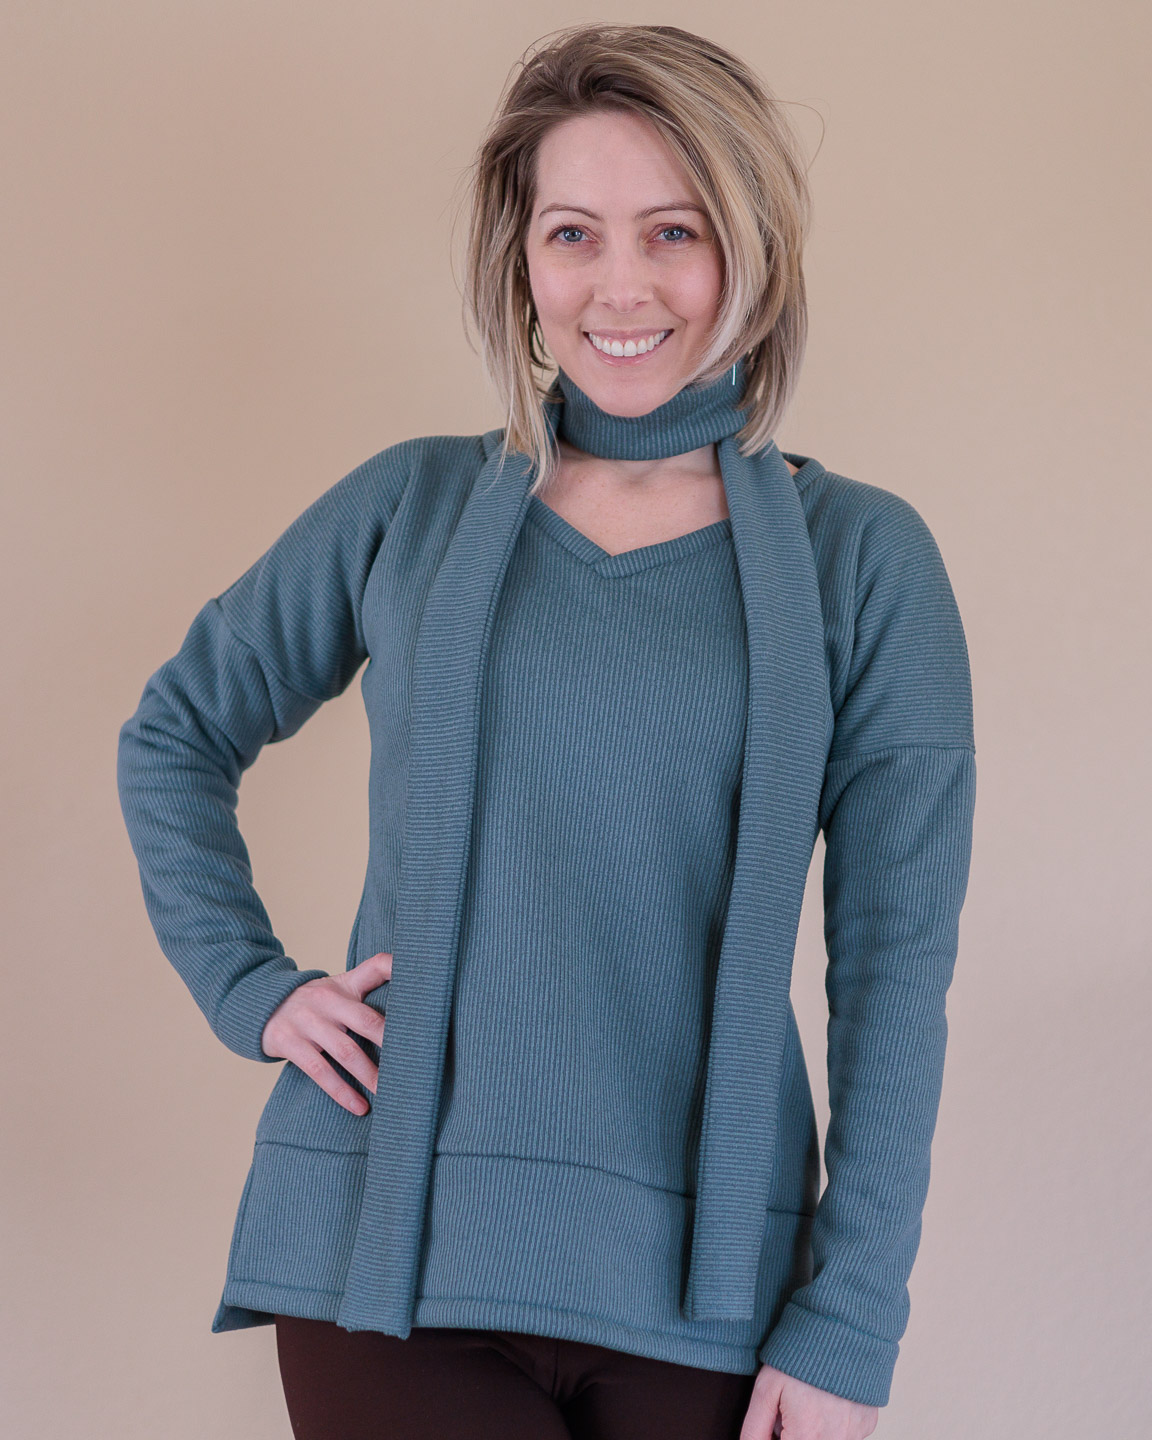
- While I love the aesthetic of a v-neck, they often leave me cold, so I drafted a skinny scarf to fight the chill (final size 2.5″ wide x 68″ long.)
- I used the square corner technique I learned on my Luma Wrap Skirt for the hem band corners and they came out perfect. Really eliminates the bulk that folding and folding again as instructed would have created.
- I used my fagoting stitch instead of ladder stitching before attaching the hem band, AND I used it again to pull together the top of the hem band after it was attached so the band would lay nicer at the sides.
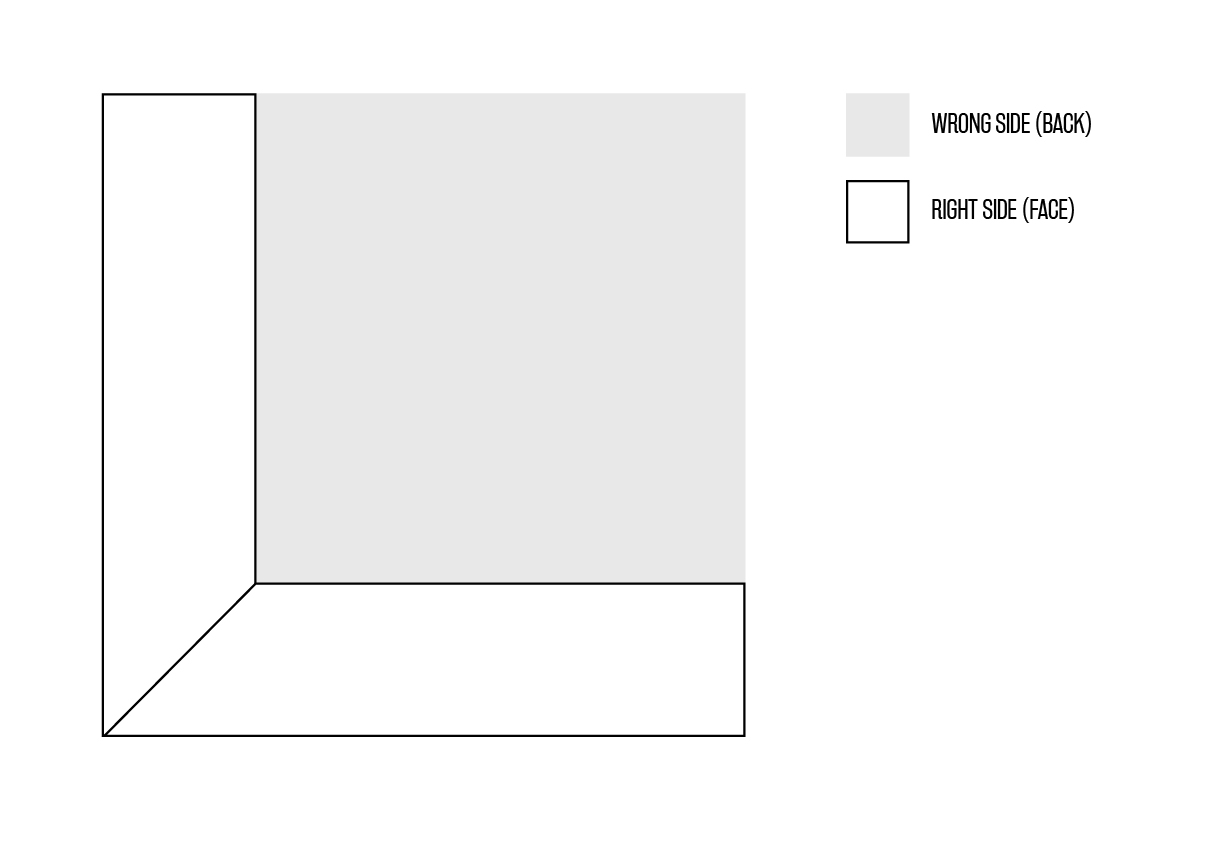
The Square Corner Technique
- Fold both edges of the hem and mark the raw edges where they intersect. (I had to use pins on this fabric, which worked fine. Ideally, mark so you can see the marks from the wrong side of the fabric.)

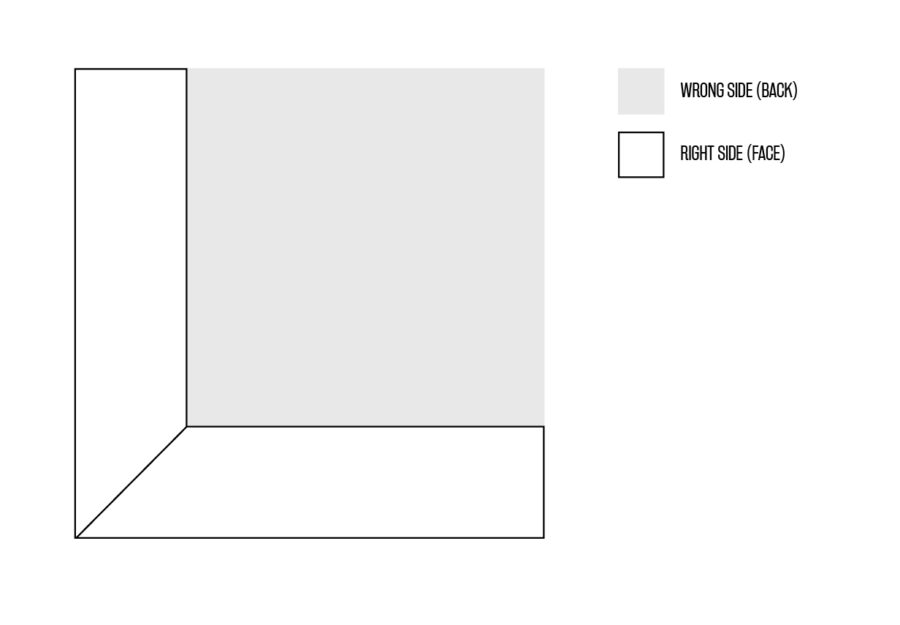
- Unfold the edges, and then refold right sides together so your marks in step 1 meet.
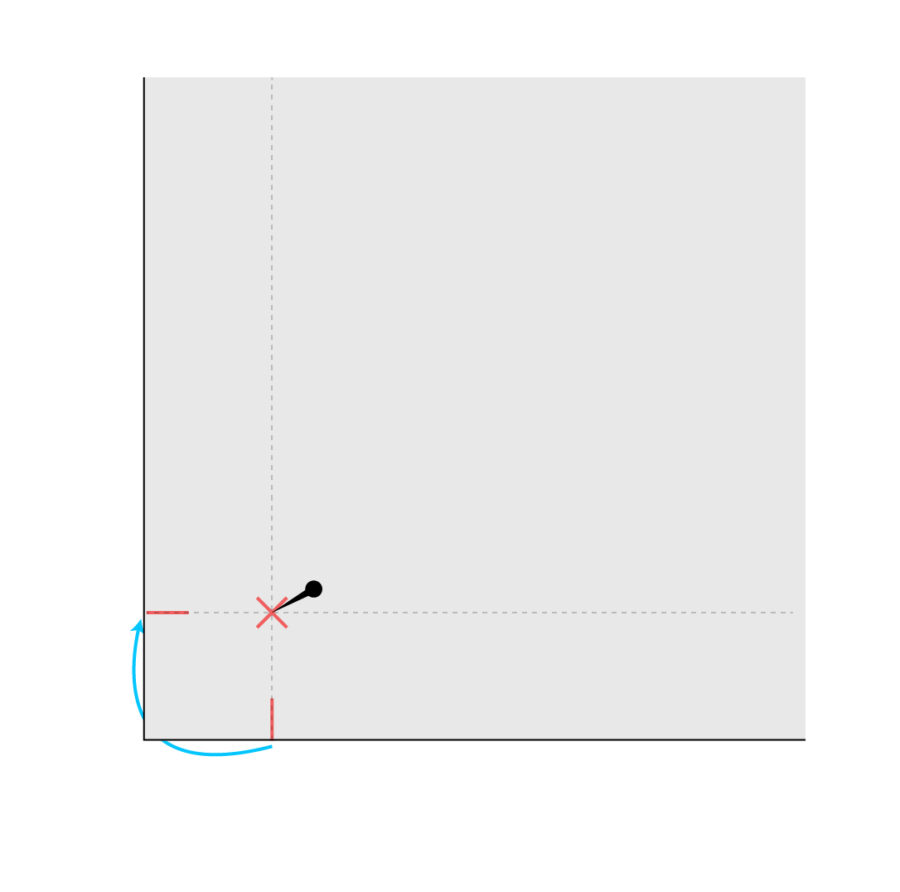
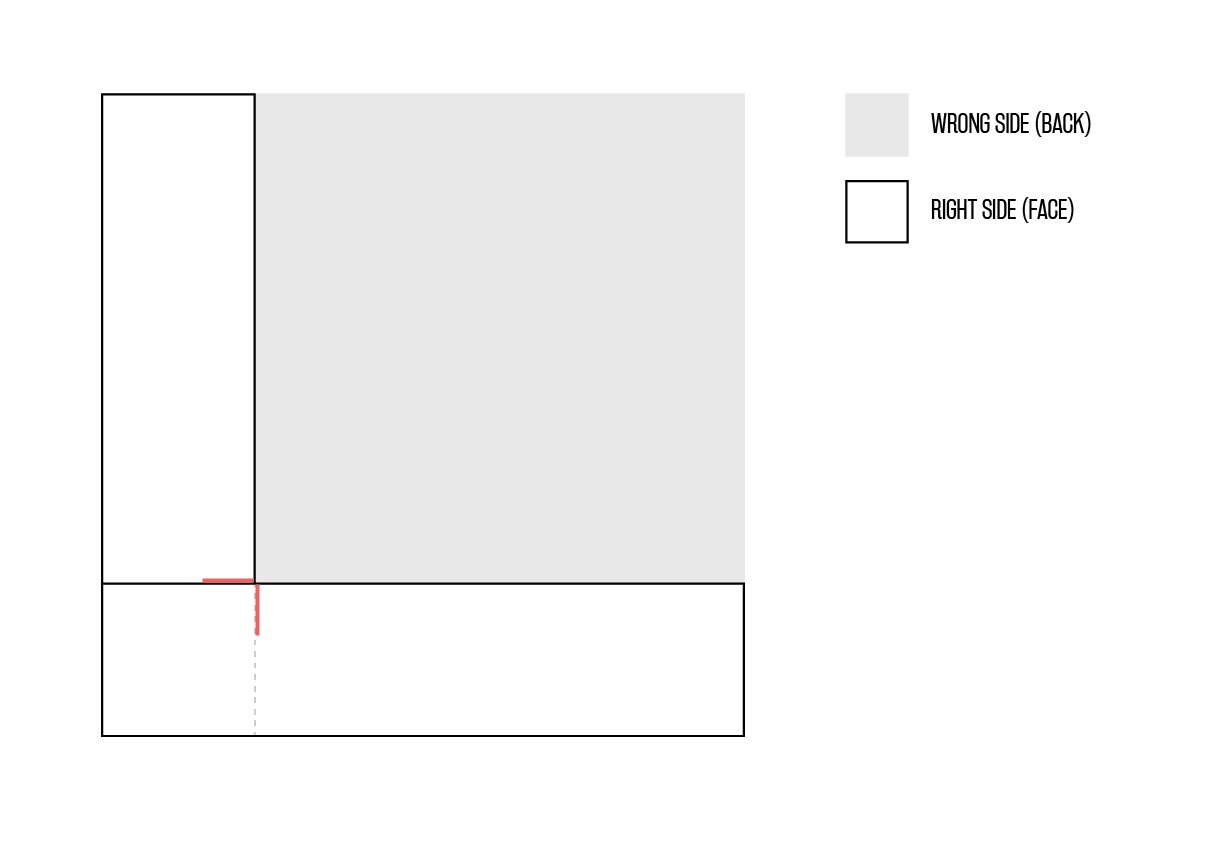
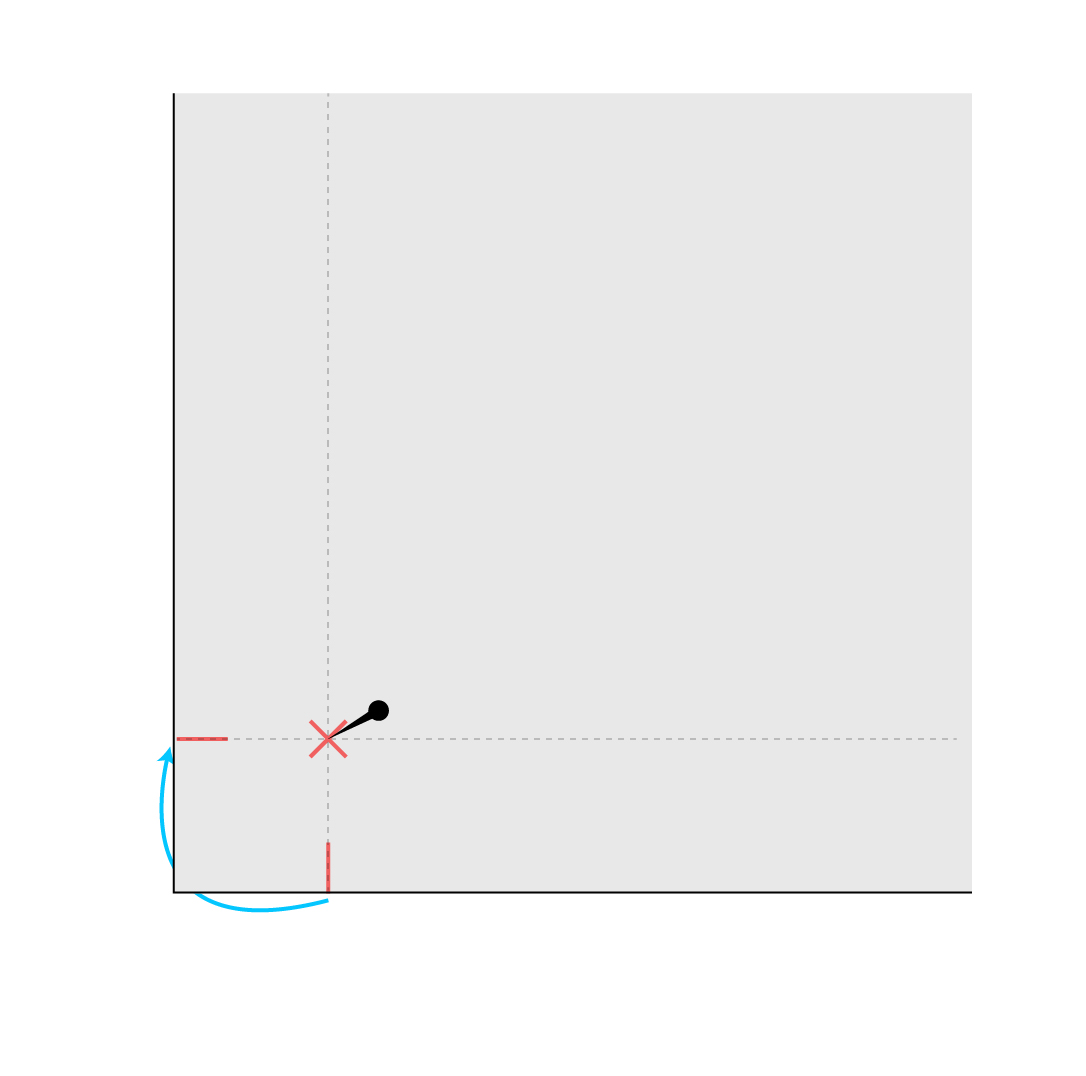
- Starting where the fold lines cross (think: X marks the spot), sew from this point to the raw edges where your marks from step 1 are.

- Trim the corner off, leaving about 1/4″ allowance. Press the allowance open and then turn the corner right side out. Poke with a dowel or equivalent stick-y thing for a crisp point. Press.
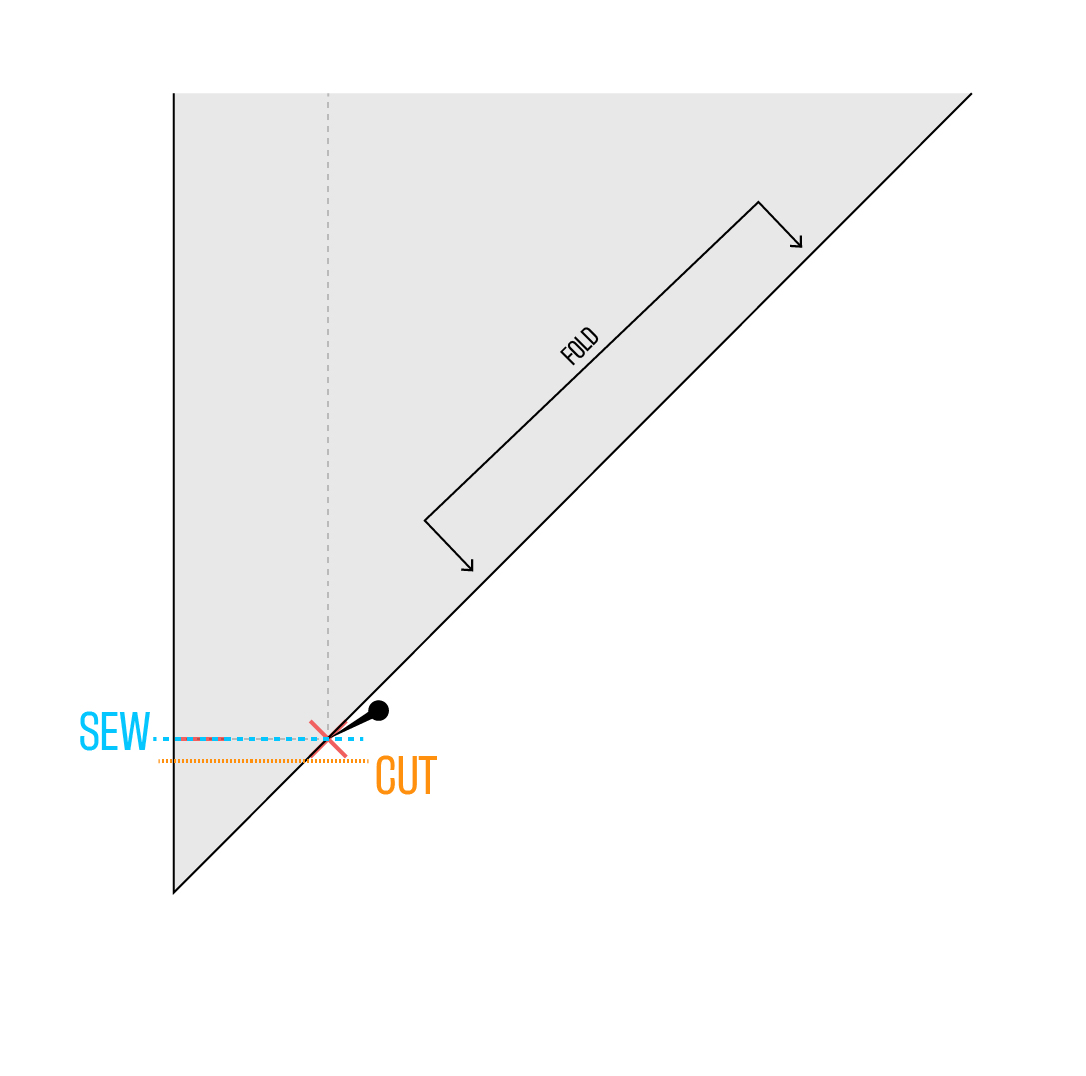
This totally works on hems with different allowances, too. For example, one edge of my hems was 1/2″ and the other edge was 3/8″.
Notes for Next Time
- Lengthen the bodice. I already made this adjustment on my pattern pieces. I added 3″ to the front and back.
- Do something about the neckline to make it warmer. I don’t know what, though. Cowl it? I definitely don’t want the included hood, and a standard crew neckline is pretty boring and unflattering. Mock neck? Maybe just a wider overlapping v-neck band would but what I’m looking for. Or maybe something like my store-bought black knitted tunic that has a lower cut at the front and is wide enough to fold over. I think that might be the winning idea right now.
Project Settings
Sewing Machine vs. Serger
| Sewing Machine | Serger |
|---|---|
|
Reduce presser foot pressure from 4 (default) to 2.
|
Sewing Machine Settings
| Presser Foot | Stitch# | Stitch Width | Stitch Length | Needle | Top Thread Tension | Application |
|---|---|---|---|---|---|---|
| appliqué (F) | 0 | 3.5 | 3 | blue tip | 4 | hem band corners |
| standard zig-zag (A) | O | 3.5 | 3 | blue tip | 4 | hem band hems |
| standard zig-zag (A) | 46 | 7 | 2.5 | blue tip | 4 | hem band fagoting |
| standard zig-zag (A | 0 | 3.5 | 3.5 | blue tip | 4 | bodice v-neck staystitch |
| 1/4 | 0 | 3.5 | 3.5 | blue tip | 4 | vneck attach at V |
| standard zig-zag (A) | 5 | 1.0 | 4 | blue tip | 4 | neckband attach |
| overeager (C) | 6 | 6 | 3 | blue tip | 4 | neck finish |
Serger Settings
| Stitch Name | 4-thread overlock |
|---|---|
| Needles | R, L |
| Finger | B |
| Threads | 4 |
| Tension Left Needle | 4 |
| Tension Right Needle | 4 |
| Tension Upper Looper | 4 |
| Tension Lower Looper | 4 |
| Cut Width | 6 |
| Stitch Length | 3.5 |
| Differential | 1.0 |
| Application | seams |
Leave a Reply